Are we there yet?
Are we there yet?
Yes, at last. It was an 8 week project, just like my contractor promised. What he didn’t tell me was that it would be 8 weeks every other week. As usual, weather, other projects, and waits for the cabinet shop to fabricate the cabinets got in the way. One thing neither of us expected was the up turn in the Norfolk Building Department’s permits business. The review we expected to take a week took three and they wanted some changes requiring another trip through the review process.
The Project
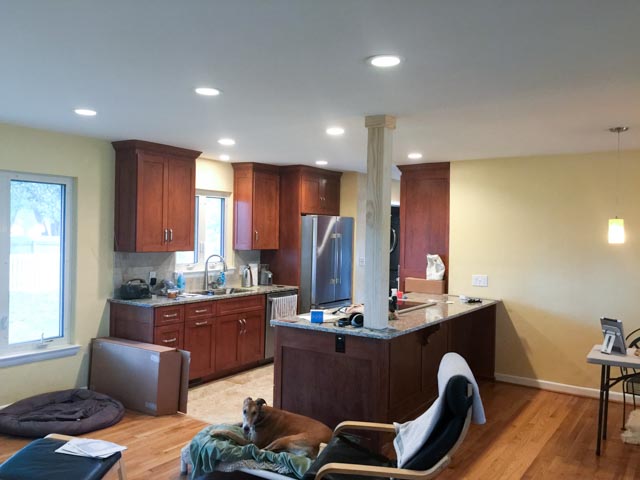
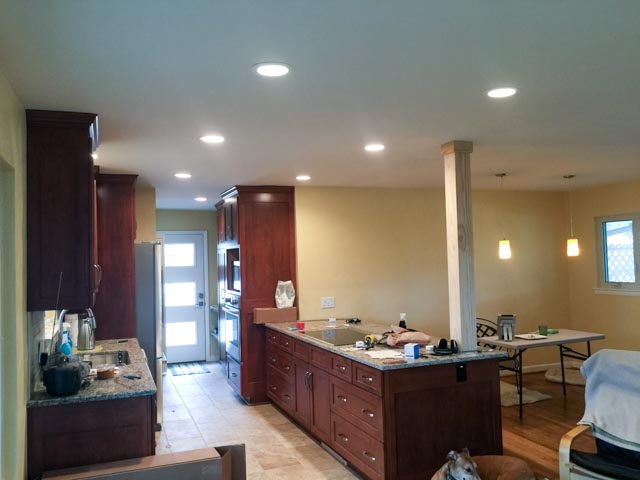
The project intent was to make a laundry and utility space in conditioned space, a new family entry that served both the carport and the back garden, and a modern kitchen that was easy to work in and allowed the cook to interact with the rest of a family while cooking and cleaning up.
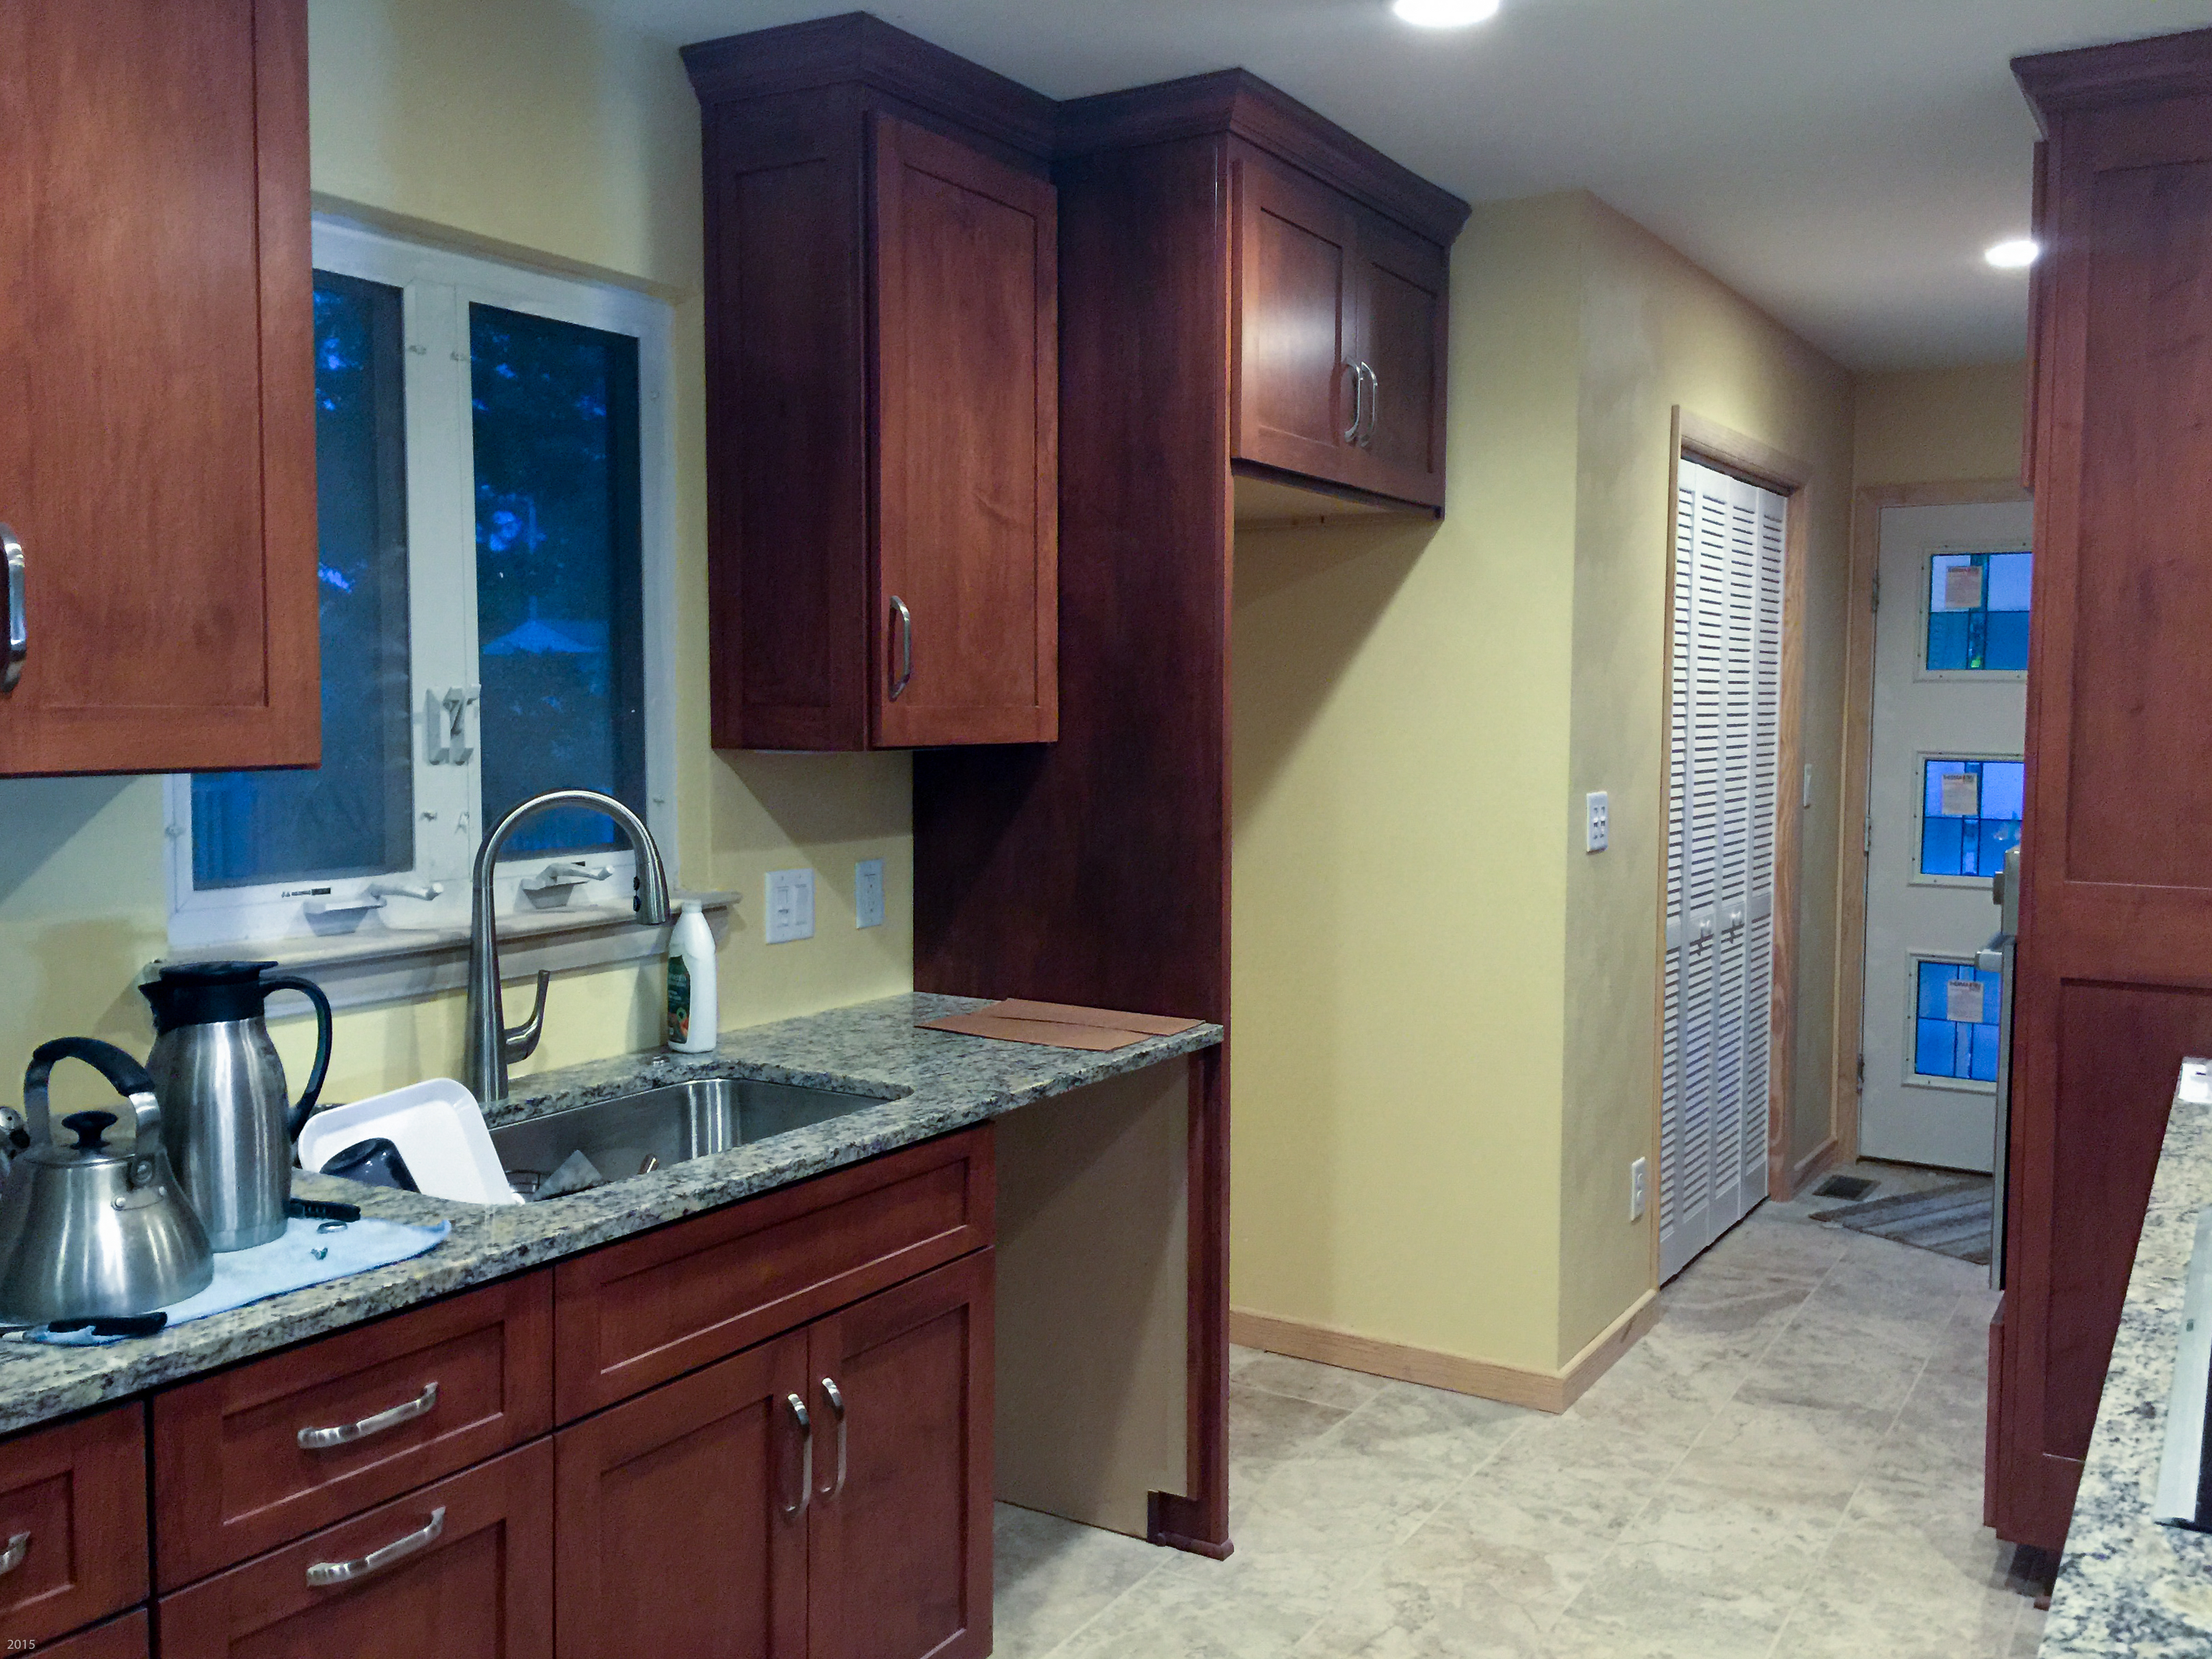
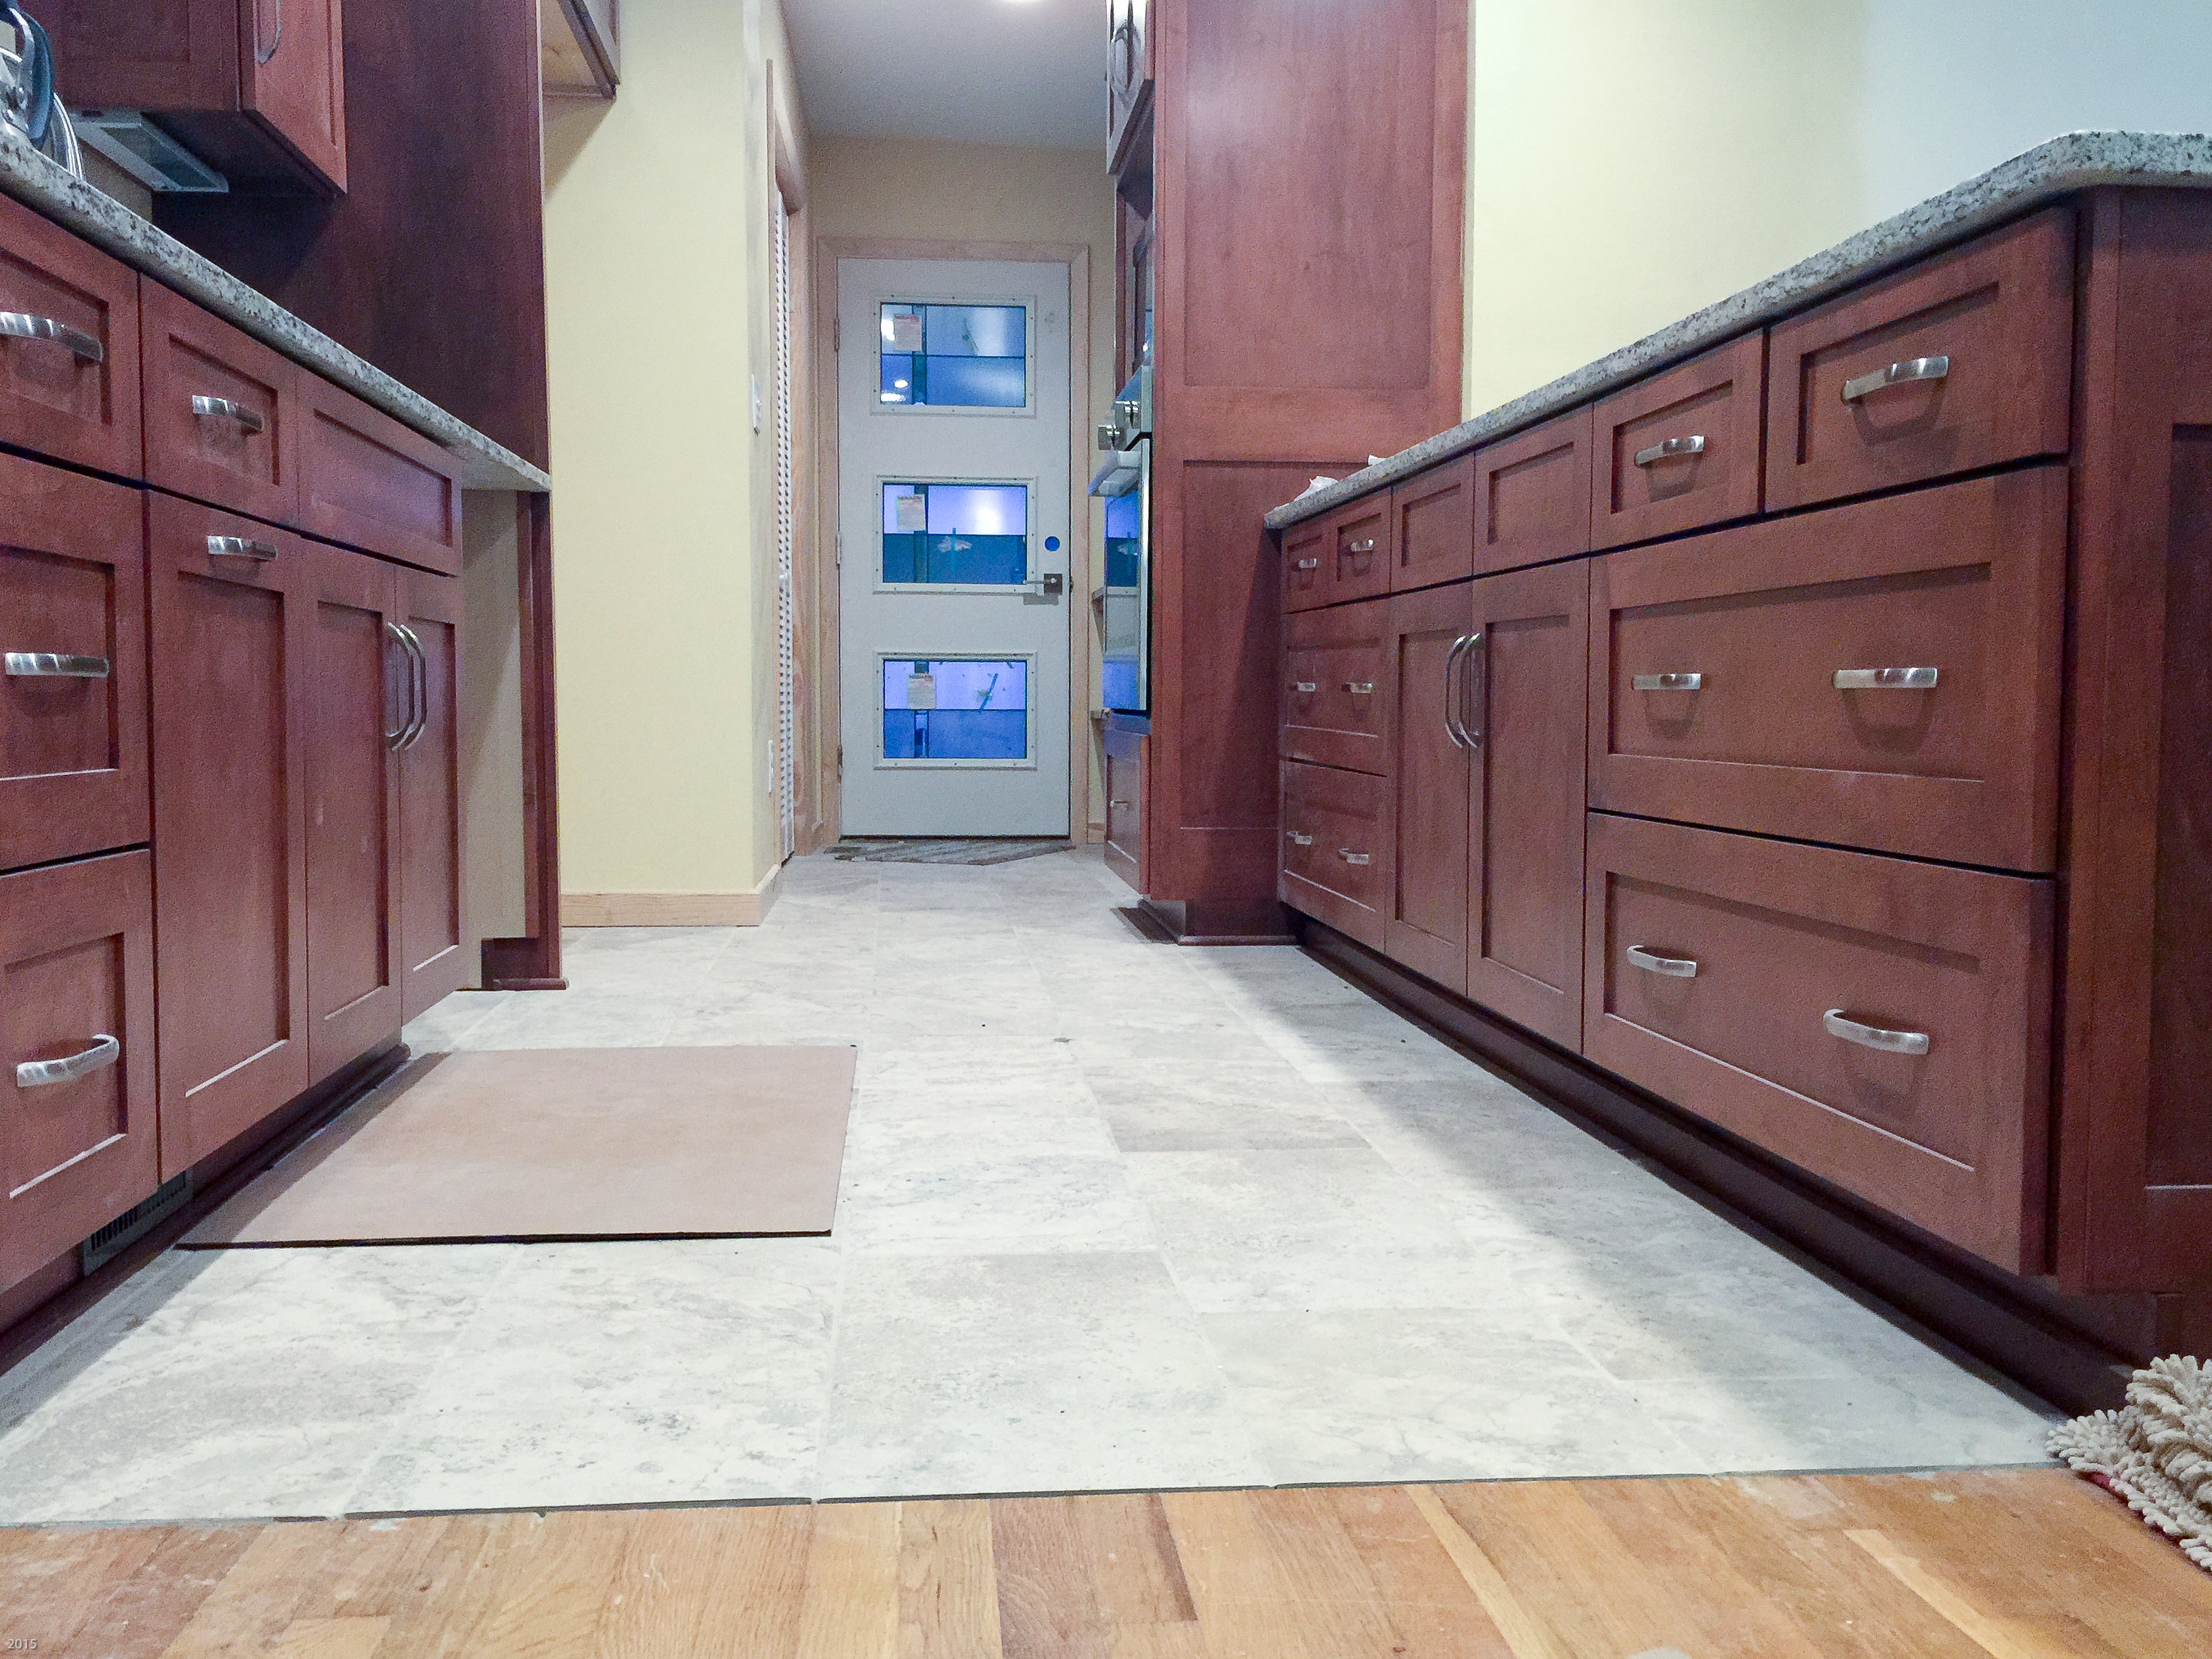
The project borrowed 4 feet of carport and the existing utility closet at the back of the carport to make a new utility alcove, new family entry, and pantry storage. This space also housed the refrigerator and oven opposite each other. A new peninsula housed the cooktop and provided proper workspace for cooking and cleanup. Prep can be divided between the sink countertops and the peninsula. The skink and cooking areas are arranged galley style with a good 5 feet of space between the two counters. It is possible to work at both counters without blocking access to the pantry and garden. And the hounds can move around without being under foot.
My Contractor
My contractor R. L. Blount Custom Homes did a first rate job . The things that stand out are the design. I had a small potatoes architect do the initial conceptual design. I played with that some on tracing paper and concluded that I wanted to move the door and change the porch design to a Charleston style porch with steps parallel to the wall.
The project was design-build. Given a statement of my goals and sketches, my contractor’s designer did a detailed design and prepared permitting and construction drawings. During this phase, my contractor did the structural design required to remove bearing walls, the structural design for two new walls, and the calculations for a beam that would carry the structure formerly resting on the 1955 kitchen’s interior partitions.
I did two things to help this phase of the project. First, I engaged a local architect to develop a conceptual design and some plan views that could be used as a starting point for proposals. The second thing I did was to write up a list of goals and preferences that each bidder could use during the proposal and estimating process.
Estimating is a bit tricky as the job must be estimated from scope of work sketches and task lists developed during the proposal phase. A detailed design comes after award but flat rate estimating guides are well refined and it is pretty easy to work up costs from the rough materials and task lists and to make an allowance for uncertainty in market conditions and approximate amounts of materials and trade time. And key suppliers like ProBuild assist with the estimates as part of their builder services.
My contractor’s designer Matt did the detailed design and construction drawings we needed for permitting starting with my sketches. Evan, my project manager, did the kitchen conceptual design that Matt started from, and tweaked the laundry closet and cabinet layouts a little bit to give us more room for the fridge.
Matt deserves a shout out for getting the new hip roof and nice porch design right. I was biting my nails as it was all going up but it has worked out brilliantly.
Matt did forget to remove some new construction boiler plate from his drawings such as floor insulation instructions. In a small addition like my 9×9 utility space and the renovated kitchen, it is accepted practice to follow the existing crawl space insulating and venting practices. Fortunately, the building department did not insist on compliance with the drawings here. We did insulate all of the new side walls and seal all plate and subfloor penetrations. All the better to keep crawly things out.
My contractor does project management and subs all of the work out: design, demolition, masonry, framing, roofing, siding, exterior finish, electrical, plumbing, drywall and plaster, tile, cabinets, granite, interior finish and painging. Every time we changed trades, there was a wait for interviews, proposals, and start of the next project phase.
Normally, this works quite well. Where it gets complicated is when a small task needs just a bit of work from 2 or 3 trades. Installing the downdraft blower went like that. The HVAC duct technician could cut the cabinet, sub-floor, and foundation and run the duct work but was not an electrician. I ended up wiring the blower because my contractor would have to call back an electrician do make up a cable connector. And Bosch had an error in the wiring instructions. More about this below.
Appliance Supplier
Ferguson Inc supplied appliances and was first rate. Bosch forgot to pack fasteners, etc in the microwave oven trim kit shown in the featured image. Ferguson came through with a parts diagram having part numbers and found everything that should have been in the box that wasn’t. And they expressed it to me over night! Great service. They also restocked an unwise choice of light fixture (looked way different than its catalog photo colors). And they swapped downdraft blower units from wall mount to under house mount for a modest restocking fee.
Masons
The Mexican masons did the masonry demolition, cut the carport slab to receive the new footings, dug the footings and made forms, poured the footings using site ready-mix, and laid the foundation and brick veneer. All of this is tricky. It has to be right or the rest of the job is off. They did an excellent job with the layout and the finished brick work is plumb and flat. They don’t work retail.
Plumbers
My steampunk plumbers Chris and Jamie managed to run new plumbing for the water heater, laundry, and kitchen without interrupting services for more than an hour or two. They specialize in new construction and renovations and don’t do repairs but they did a great job on both the bath project and the kitchen project.
The Plastering Crew
The plastering crew, also Mexican, did a great job with the drywall and plaster. We ended up doing new skim coat over the existing lounge area ceiling because it would have been difficult to match the 1950’s scratch coat finish. Another trade that doesn’t do much retail work.
The Electricians
Anchor Electrical did a wizard job with the wiring. They had a bit of a surprise when they found ungrounded circuits for the old oven, and dryer. The cooktop circuit was new (2006) and could be extended to its new location. The other 240V circuits, lacking grounds, had to be replaced, something Evan missed when he was pricing the job My contractor picked up the cost of the 240V circuits that had to be replaced.
The thing I really like is that the crew thought about where the recessed lights should go and supplied Lutron dimmers for the recessed lighting. With Cree LED trims, the place is sunglasses bright when the lights are full up. I normally run the lighting half-bright, even for dinner prep and cooking.
Given a description of how I intended to place the dining room table, the lead electrician properly located the fixtures for the pendant lamps. These kept getting in the way during the tail end of the project but once the table was placed, they were exactly where they needed to be and at the proper height.
They also did a nice job with the yard light replacement. They supplied nice flood lamp fixtures that you won’t find on the shelf at Home Depot. These completely shield the lights from water and have a nice finish that will stay bright and looks good against the white trim.
The dryer circuit was repurposed to serve the Rinnai tankless water heater which is on its own circuit. The red (properly marked) became the ground. The lighting circuits in the old house had to be reworked. None were to code. Power went to the fixture with a switch in the return. We don’t do that any more. I ended up picking up those costs as repairs. Similarly, the outdoor lights which had been on the fritz since my return. The switch was in the work area but there were problems in old work outside the work boundary.
These guys are highly recommended for lighting updates and repair work. Good old work skills and diagnostic skills. They also relocated data, RF, and phone circuits that needed to be moved.
Flooring
Adrian Hardwood Floors and Tile laid the ceramic tile floor and backsplash, the new wood flooring, and refinished the existing floors. The tile flooring took a week: 2 days of layout and cutting, a day to lay, a day to grout, and clean up. The floor refinishing took 2 days with 2 more that I had to be off the floor while it cured. Nick, Missy, and I spent 3 nights in the Norfolk Residence Inn enjoying downtown Norfolk. Adrian receives my recommendations for floor refinishing and floor replacement. The young crew was patient and meticulous in the layout of the floor and backsplash.
Local Cabinet Shop
Chuck’s Custom Cabinets and Construction deserves a shout out for the design of the cabinets. Evan and Chuck refined the kitchen layout, especially the stepping down of the cabinet depth in the pantry, the drawers in the peninsula, and the overhanging buffet or dining counter area. Chuck designed and built the cabinets working from Matt’s plan view and a walk down of the site to confirm measurements.
Chuck set the job up to use standard cabinet sizes with a bit of cleverness at the refrigerator where he took up the slack in the as-built ground truth. Chuck’s guys also installed the cabinets doing a wonderful job of coping with the departures from true in the old structure.
The galley kitchen design added 3 feet to the dining area depth that were formerly part of the 1955 kitchen allowing me to put the dining table parallel to the end wall where it had been parallel to the front wall while still having room to use the table ends or the counter.
Granite Fabricators
Panda Kitchen fabricated the granite and installed it. Everything fit. They cut the cooktop and downdraft opening in the field and dealt with the departure from square with a combination of planned off-square cuts and field trimming.
The granite finish turned out nicely and they cut the notch for the column in a most clever way. Using a water jet stone saw, they cut the two sides 2 degrees off vertical so that the plate cross section was keystone shaped. This made the piece self-supporting while the epoxy cured. The piece fits so well that you have to look closely to find the filled joint. This was another place I was biting my nails as the stone changes color during final polishing.
For those doing kitchen renovation as opposed to remodeling projects needing architectural and structural work, I’d recommend Panda in a heartbeat. They have built two kitchens for a friend, the first a planned remodel, the second, reconstruction following a fire.
More about delays
The project delays resulted from the weather delaying start of earlier jobs, a demanding client that caused lots of rework on a large job that was concurrent with mine, and the inevitable friction of as-you-go contracting of trades. We did have to back up and do a bit of rework on the roof to fix a goof that the gutter contractor caught, and several finish items that required multiple trades like the downdraft blower required trades to come back,
Missing parts and other chaos
My goof
Although everyone was careful to keep the jobsite neat, we did lose some of the bits for one of the deadbolts which were in my scope of supply. Kwikset retail packing is impossible to repack so stuff rattled around and eventually the screws went missing.
Kwikset supplied the parts we misplaced on the job at no cost. That delayed us a bit. I ended up finding my chisels and doing the mortise changes needed for the door plate and strike plate. We found that the parts had gone missing when the interior finish folks were doing their bit of the job. I had supplied the lock sets so the parts were my problem. They’re probably with the eyeglasses that went missing this summer. I suspect the red chaos unit named Missy.
Bosch Goofs
There were two. The downdraft installation instructions for the in-line blower managed to have you wire the cable from the cabinet mounted snorkel assembly to the crawl space mounted blower incorrectly. The contract tech writer who did the manuals looked at the instructions for wiring the blower end connector and had you do the same for the plug from the snorkel that was to mate with it. The end result was that the field wired connector was backward. This connected medium speed to ground popping the breaker.
Fortunately, both cables used the same color code so it was easy to take the hood off the factory wired connector and wire the field wired connector to match.
Bosch also forgot to pack the loose parts for the microwave trim kit. A call to Ferguson had the needed parts ordered and on their way in a day. Everything was stocked in the US so UPS was able to make the missing bits appear the day after they had been identified and itemized.
Bosch designed the trim kit mounting clips for frameless European cabinets. Evan, my project manager, came out and spent an hour fiddling with saws and screws to make temporary blocking only to determine that we could get the cabinet mounted bits mounted directly to the face frame. This is where experience comes in. Evan picked some screws that wouldn’t split the face frame, something I’d get wrong.
But We’re not 100 Percent!
Evan bought matching paint to paint the endgrain of the Trex steps. He forgot to turn that task over to the painters. It will take longer to clean the brush than to do the work so I’ve picked up that task. Probably Wednesday once it is warm again.


You must be logged in to post a comment.