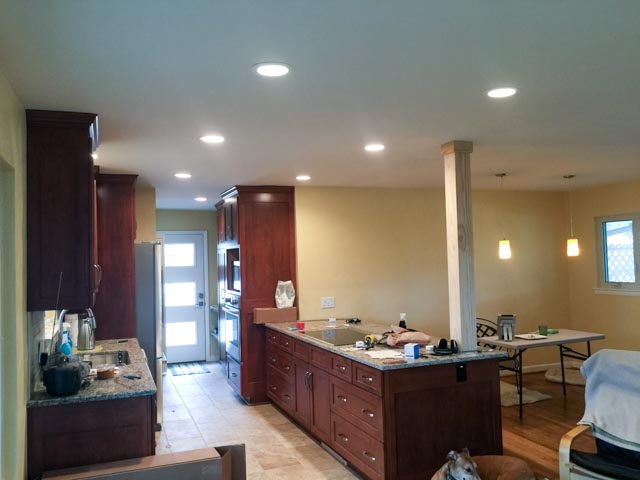
When I bought 3444 Fletcher 10 years ago, I did so with the intent of remodeling the bathrooms and kitchen. In 2013, I remodeled the baths. In 2015 I join the ranks of the homeless while the kitchen is remodeled. This is a big project that sacrifices 5 feet or so of the car port to make a family entry, laundry, and pantry space adjacent to a remodeled open plan galley kitchen. This project will have the building apart for six weeks or so for demolition, construction of the addition, structural changes to open the kitchen to the lounge area, etc. During that period, I’ll be without hot water, the laundry, and refrigerated food storage. Once the structural bits are done, there is probably a month of interior finish to paint, install flooring, and install cabinets and appliances.
All of my appliances except the water heater are old and living on borrowed time. It is time to replace oven, cook top, washer, dryer, etc. The state of the appliance market in the United States is weird. Americans seem to want everything bigger rather than better so we have huge refrigerators and laundry machines. With time it becomes harder and harder to find equipment appropriate for older or smaller homes because fashion has moved on. This has caught several of us.
Design-Build
Cousin Bill Watson serves 1 percent clients in the Beach Mountain, NC area. Bill’s clients usually begin a project by hiring an architect and developing plans and specifications for the multi-million dollar projects that his company executes. Now you know why Bill has gray hair! The other 99 percent of us are usually working in a design-build project environment. These projects begin with a conceptual design that is sufficiently detailed to serve as input to the estimating and design processes. The builder engages a designer or architect and structural engineer as needed to develop construction plans in the opening phase of project execution. Most of the detailed design occurs between project award and permit application as foundation and structural drawings are required by the permitting process.
Why Pick Appliances before Award?
Aunt Betty, proud member of the 1 percent, just replaced her built-in refrigerator. The machine had become ill and, apparently, was uneconomical to repair. This turned into a $20,000 project. Built-ins are often 84 inches tall. How do you get it into the house? Will it fit where the old one was? What has to change? Is the condenser built-in or external? Even if you’re not so well off, you face similar issues. Can you get a 36x36x72 inch 400 pound blob through the house and into cabinetry? How does the machine size affect the cabinetry design? How much space is required left, right, behind, and above to actually get the machine in its pooka?
If you have bounding box sizes for each appliance, it becomes a simple matter for the designer, using his 3-D CAD software to verify that each object can be brought in, maneuvered to its proper location, and has service access. With the machine moved out of its pooka, is there sufficient room to replace the various field-replaced subassemblies? Checking now saves grief during interior finish. The washer-dryer was of special concern because it shares a closet with a tankless water heater. If I stack the appliances, can I get the stack in? Can I service it. How does the pooka change for side by side mounting?
Enter Energy Usage Standards
Energy conservation standards began during the first Oil Shock back in 1973-74. The southwest Asia oil producers, miffed by US support of Israel during the Yom Kippur War, cut off oil exports to those who helped Israel. Oil prices soared and some limited rationing began. The formation of the Department of Energy and the beginnings of the Energy Star voluntary efficiency standards and corporate average fuel efficiency (CAFE) standards trace their origins to this period.
In Europe, not having robust fuel sources, energy has always been expensive and European white goods manufacturers have always been at the forefront of innovative appliance design. European manufacturers perfected the front loaded laundry machine. Only one US manufacturer, Westinghouse, attempted to make a home front loader. Being more expensive than top loaders and having door skirt materials problems, Westinghouse abandoned this design in the ’70s. Front loaders were more energy efficient (used less water) and washed better but cheaper won over better in the US.
European homes are also smaller, so European and Asian appliance manufacturers have designed efficient yet compact appliances for their home markets. With the changing regulatory climate in the US and changing customer preferences, they have begun to offer these advanced machines in the US market.
Condensing Dryers
I’ve had a condensing furnace for nine years. Does anybody make condensing dryers? Yes, Whirlpool, Bosch, LG, and Samsung do. How does a condensing dryer work? Regular dryers use an open cycle. They draw in room air, heat it and move it though the drying drum and discharge it to a vent to be released outside the structure. During dryer operation, outside air is drawn into the building and must be heated or cooled.
A condensing dryer uses a closed loop drying cycle. The air handling draws air from the drum, passing it trough an air to air heat exchanger and heater on its return to the drum. A smaller heat source starts the drying process. As the warm air begins to evaporate water from the clothing, the air to air heat exchanger cools the drum exhaust air recapturing the heat that evaporated the water to be used again. The condensed moisture drains to a tank and is pumped to the building drain system.
The most advanced machines of this type use a heat pump to supply the heat input to the drying process. The heat pump extracts heat from the room air and transfers it to the drying air between the condensing heat exchanger and drum. In essence, the heat pump is a small refrigeration machine that heats the dryer air by cooling the room air. The heat transferred to the drying process is greater than the electrical input. There is no free lunch. Building heat gains or the building’s heating plant supplies the heat that is transferred from the room air to the dryer air.
A condensing dryer has the advantage of using only 115 volt power in the US and does not require a vent, just an second drain connection like that used by the washer.
Combo Washer-Dryers
In Europe and Asia, it is popular to install the washer-dryer in the kitchen. By using a front loading design, the same drum and motor can serve both the drying process and the washing process. In both machines, an outer drum surrounds the clothes drum and contains the water or drying air. The washer is the more demanding of the two because the drum must be water tight. Water tight is also air tight. It is a simple matter to package the dryer heater, blower, and condensing heat exchanger in the same cabinet as the washer components.
There is a catch. Combo machines can wash more than they can dry. The machine must be loaded based on its drying wight rather than its washing weight if you intend to wash and dry in a continuous run. If you load the washer to its full rated wash weight, the wet clothes must be split into two drying runs. Being single, it becomes pretty easy to manage my washing to allow the continuous wash dry process. Gone are the days of stuffing the drum full from a heaping laundry basket. This means an additional load each week but washing whites and coloreds separately (sounds a bit Jim Crow) naturally leads in that direction. For those with kids, the battle rhythm is to do a load each day rotating around the household members.
The advantage of a combo washer dryer is that no stacking is needed. This solves the problem of sneaking a tall washer dryer stack past the tankless water heater. Those with large families often buy a matching condensing dryer, load the washer full, and split the drying between the two machines.
Refrigerators
Somehow, the appliance industry has convinced us that we need ever larger refrigerators. When I first moved out on my own, 15-16 cubic foot units were the norm. Today, you are hard pressed to find machines smaller than 21 cubic feet. TARDIS technology not being available, to be larger on the inside, they must be larger on the outside. This results in height, width, and depth growth of machines over time. Mandatory environmental and energy efficiency standards require better and thicker insulation, larger heat exchangers, different refrigerants that don’t burn holes in the ozone layer, etc. All of these technical forces tend to make for a bigger box. In anticipation of this trend, I had a local handyman shorten the cabinet mounted above the refrigerator to accommodate a taller machine should I have to replace mine before I was ready to remodel the kitchen. The new kitchen will be designed with a bit of margin.
Selection Considerations
My space and door constraints require a shallow refrigerator that will fit through the exterior doors. This pushes me to a “cabinet depth” machine. In reality these are 29 to 30 inches deep, 36 inches wide, and 76 inches tall. This is about the largest unit that will come into the building through a 32 inch door, my bounding constraint. When thinking about this stuff, remember the doors and handles. Most “cabinet depth” machines stand proud of the cabinet by the door and handle distance. This is needed to allow opening the doors without requiring additional width to accommodate the open doors. LG is one of the better manufacturers when it comes to giving measuring guides.
US refrigerators are generally Energy Star rated. Energy Star now has tiers. The best machines are tier certified. The European standards and standards process are different and Europe uses 220 volt 50 Hz power. Machines tend to be made for one market or the other. Europe does make smaller cabinet depth, 24 inch machines but these are deemed too small for the bigger is better US market.
Current Fads
The current market taste in refrigerators is for a bottom drawer freezer and top refrigerator with multiple condensers, one for the freezer and a second for the refrigerator. These are a bit more expensive and a bit less efficient than the older top mount design. The advantage is that they offer better access to refrigerated foods. The following factors influence price.
- Exterior material. Stainless steel is extra
- Interior bins and shelving.
- Door bins. More expensive machines have more flexible door bins
- Freezer drawer bins. More expensive machines provide removable baskets making storage more flexible.
- In door water and ice dispensers
- Internal ice maker and water dispensers
- No ice and water dispensers
Through door ice dispensing failures is the largest cause of machine trouble. An inside bin is fine!
Through door water dispensing is a cleaning problem. The little drop tray loves to grow mold and is the devil to clean. These are two dumb features that I’ll forego.
Cooking
My cooking preferences are for a separate cook top and oven. I like the option of storing the pots and pans beneath the cook top and having the oven at a height that is easy to load and check. I bake bread for myself so having a good oven in a usable location is important. It needn’t be fancy, just predictable in its behavior. Bells and whistles aren’t needed but self-cleaning is nice. In my vegetarian phase, I make the occasional pound cake to celebrate birthdays, roast vegetables, etc. but rarely cook meat or bake cookies (requires too much attention).
I often make beans and rice concoctions with a taste for middle eastern, Caribbean, and African fare that is naturally vegetarian and makes rich use of spices. Every now and again, I’ll make a batch of all meat chilli for the freezer and space out its consumption to keep the gut beasties mostly vegetarian.
Cook Tops
This is my one splurge in a more moderately priced kitchen. I’ve been living with a radiant cook top and like it but it stays hot making it a bit of a safety hazard if a curious dog puts paws up on a hot element. That led me to consider an induction cook top. Talking with friend Pat Ives, she has a new one and likes it after making the move from radiant.
Radiant or Induction
One of the great things about both radiant and induction is that pan temperature responds pretty quickly to controls. It is as convenient as gas in this regard, just not as hot as a restaurant gas burner. Stuff has to be cooked in smaller batches.
Interestingly, induction is beginning to rule for sauce and desert-making tasks in restaurant cooking. Induction is becoming preferred for soups and sauces because of its feedback control of pan temperature and uniform heating of the pan bottom for temperature sensitive processes. Controlled even heat is an advantage for frying bacon, scrambling eggs, cooking steaks and burgers, etc. On the rare occasions that I cook meat, I’d just as soon not have an operational test of the smoke alarms. With radiant, I’ve let the pan temperature get away and listen to the alarms for an hour!
An advantage of both induction and radiant over gas is that they provide smooth counter space when not actually in use for cooking. Skoshi counter top, I knead bread and do other non-violent tasks on the smooth surface of the radiant cook top.
Being leery of electronic controls, I opted for knobs when I purchased the radiant top. This time I’ll go with touch controls. Touch is the only way to get the magical features.
How Induction Works
Induction cook tops use electromagnetic skin effect to induce circulating currents directly in the cookware. For this to work, the cookware must have magnetic material, usually cast iron, carbon steel, or magnetic stainless steel (18-8) in the cookware shell. The material may be cast, roll bonded, or bonded during the stamping process. All induction cook tops, portable and built in, have pot sensors and will trip when the pot is removed or will not start if the pot has too little magnetic material to work correctly. Magnetic disks are available to use with non-magnetic specialty pots. These work like the old solid disk cook tops of the 80’s.
Cooktop Size
Larger gets more elements and more flexibility of use but requires a 40 amp circuit. Most 30 inch cooktops require a 30 amp circuit. Something to keep in mind. If you are running new wire, run a 40 amp circuit even if you install a 30 inch cooktop. If you switch sizes down the road, you are good to go. I ran into this when replacing a 70’s cooktop with a modern cooktop. The newer product needed a 40 amp circuit even though the one it replaced was 36 inches. Once you have a cutout, you’re pretty much committed to that size for the life of the counter top which can be forever with granite. Unlike refrigerators, cooktop sizes have stayed in the 30 to 36 inch range. Fortunately, they’ve not grown to aircraft carrier size.
The 30 inch cooktops usually have 4 usable elements, and 11 inch element, a pair of 8 or 9 inch elements, and a six inch element. The 36 inch cooktops usually have an 11 inch element, a pair of 8 or 9 inch elements, and a pair of 6 inch elements. As mentioned above pot and element size must be matched fairly well. A large 11 inch element will not be happy with a couple of quart sauce pans sitting on it.
Pots and Pans:
Induction requires that pots and pans be magnetic. The magnetic tricker that makes induction cook tops work requires matching of pot to element. The two must be of similar size. Induction cook tops have sensors that stop the cooking process if a pan is not present or does not interact with the magnetic field correctly. The following types of cookware are known to work.
- Magnetic stainless steel like those made by All-Clad
- Other cookware with the induction symbol stamped on the bottom
- Cast iron cookware like that made by Lodge
- Carbon steel cookware like that made by Lodge
Today, a helical squiggle stamped on the pot base identifies induction capable pots. If this pot is not Lodge cast iron and does not have the squiggle, don’t buy it. Even if you have a radiant cooktop, new pan purchases should be induction capable pans.
Fussy Cooktops
Pots and element sizes must be matched. Putting a small pot on a large element will cause the element to ignore the pot. Pot and element must be close in size for the element to recognize the pot and heat it. This and the sensitivity to material caused some interesting behavior in older induction cooktops confronted with randomly chosen but induction ready pots.
YouTube has a number of videos of confused cooks trying to cook with “induction rated” cookware that their stove cannot sense. Sometimes the stove ignores the pot entirely. Other pots are sensed on some burners but not others or if they are moved onto the cooktop just so. This seems to be an issue with earlier cooktops and with Asian brands.
Bosch has a feature in its Benchmark cooktops called Flexinduction. What Bosch did was to make a rectangular cooking zone having four elliptical coils that can function independently with small pots, in pairs with larger pots, and together to heat a grill or griddle. These elements have been designed to be pot insensitive. Bosch has a video of a demo unit made with a white top and back lights showing the active element. They put a pot on, move it back and forth, and the light follows the pot, firing one or two elements as the pot moves off of one element to a second. This top was able to heat a small espresso maker, a 1 quart sauce pan, 2 quart sauce pan, etc. The elements may be used independently, in pairs, or in fours.
In its other lines, Bosch makes a point of mentioning that it has robust pot sensing logic. Apparently, they are well aware of this issue and have been careful to design the pot sensing to be robust and predictable.


 To the left facing the door is a laundry and utility alcove that houses the Rinnai tankless water heater and the laundry. The laundry equipment are Whirlpool high efficiency washer and dryer. The dryer is ventless with a heat pump heat source. Surprisingly, it works quite well in “Eco Mode” in which the heat pump supplies all of the drying heat. The dryer has a resistance heater that can be used to supplement the heat pump or by itself. When using the heat pump source, the drying times are longer but energy usage is 1/4 that when just the resistance heater is used. The heat pump cools the air leaving the drum and preheats the air entering the drum. The water condensed out of the air accumulates in a sump and is pumped down to the drain.
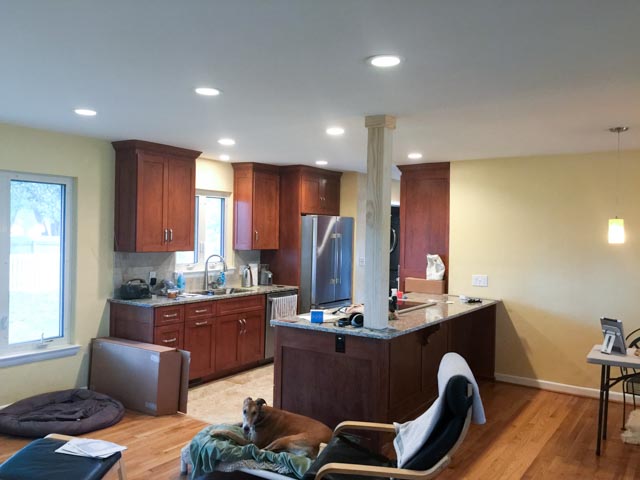

You must be logged in to post a comment.