
In this post I’ll describe photography at Dismal Manor, our equipment, and the production workflow here. We use Skylum products in that workflow, currently Luminar AI but expect to migrate to Luminar Neo in 2022.
Revision History
- 2021-11-28 Original
- 2021-11-29 Rewrote the AI parts and added a reference. Although introduced to AI back in graduate school, AI concepts and theory have been generalized over unifying concepts and AI practice has changed drastically especially in image processing.
References
- https://en.wikipedia.org/wiki/Computational_photography
- https://en.wikipedia.org/wiki/Luminar_(software)
- https://skylum.com/luminar-ai-b
- https://skylum.com/luminar-neo
- https://en.wikipedia.org/wiki/Snapseed
- https://www.thecompletepixel.com/luminar-ai/
Photography at Dismal Manor
Photography at Dismal Manor largely supports the Greyhound’s Twitter habit. Images illustrate daily life tweets and replies to those we follow. We aim to highlight greyhounds in the retired companion role in hopes that more consider them as a next dog.
What we shoot
I’m mostly a landscape and pet (my greyhounds) photographer. Most images are found when an interesting posture or behavior appears, or the weather is dramatic. Lots of sky, especially at morning and evening twilight and in the two golden hours when the low sun makes a creamy yellow light with rich shadows.
Cameras
My iPhone 11 is my favorite camera because it makes a good photo under bad circumstances. It’s a regular iPhone, not a Pro so it has less magical modes and no exposed camera raw files. It takes a decent video, still exports from video are sharp, and it can cope with hand-held shooting in conditions that would make the real camera unusable.
The image below was hand-held using the porch light for illumination. iPhone 11 made a lengthy time exposure in which multiple images were captured. Internal post processing combined the images to make a sharp image of Rocky and the background. You can even see the algae growing on the fence.

A Sony Alpha 6300 is our “real camera” that fills in when the talents of its 20 to 200 mm travel lens helps. A fast Sony/Zeiss 35 mm prime lens is under consideration. There’s just no substitute for big glass and focal lengths picked with sensor diagonal in mind. When the lens is “fast”, that is, has a big aperture, there is opportunity to use depth of field in planned images and even snapshots with the camera in aperture preferred mode. When things get fast, the “real camera” can shoot in shutter speed preferred mode. You can also pick the “film speed” or sensor sensitivity for a rich image or to salvage a dark scene.

This year, we learned to perform exposure cuing on the iPhone so we shoot more sunrise and sunset photos with it. Tap the sky and iPhone camera figures out that you want it to have its little AI brain make a good capture of the sky. Otherwise, it looks for a face. Not finding a face, it looks for a creature, especially a moving creature. Read on to learn how I processed this image in post.

The “Workflow”
Every photographer has a workflow. Workflow is a bit pretentious term to use for Dismal Manor photographic practices. Mostly, we are snap-shooting on the iPhone 11 built-in. Handheld. In whatever crappy light is at hand. Occasionally, we get the Sony out, set it to bracket, in one of the automated modes, and go at it.
So we shoot a bunch of stuff, let it go up to iCloud, and each morning we check the Email, bank accounts, and photos. We edit and favorite tag images every day or two. We let these sync around back to the iPad where we use them as Twitter images.
Photos App is our Asset Manager
Professional asset managers such as Adobe Lightroom are designed to efficiently spool off photo shoot images, apply common transformations to them, and catalog them by client and shoot for professional photographers. Pros are always working by the client, job, session, and image in session.
Amateur photographers are more interested in time, place, and subject matter. After trying to tag things in Lightroom, I finally gave up as duplicates were moving back and forth between the device universe and the Lightroom universe cluttering up the camera rolls and the asset library.
So I just shoot things, import into Photos App, and let Apple magic organize things. I’ve found it easiest to use this view to locate images by time and content.

Our iCloud Photos Settings
I find things are well behaved when I use the following iPhone and iPad iCloud Photos settings. These settings keep the originals in iCloud and on my iMac.
- iCloud Photos on
- Optimize iPhone Storage checked
- Download and Keep Originals not-checked
- Shared Albums your choice
The iMac Photos iCloud settings are
- iCloud Photos on
- Download Originals to this Mac on
- Optimize Mac Storage off
These settings keep my originals here on the iMac where Time Machine grabs them for backup.

Skylum and Luminar
Skylum has a long history and the author’s experience with this style of editing product dates back to the early days of iPhone apps in 2009 or so when SnapSeed landed.
Origins as known to the author
Remember NIK Collection photo editing tools and SnapSeed. SnapSeed began as an Apple iOS photo editor. Google, needing an editor, acquired NIK, brought SnapSeed in house, and morphed it into Photos for Android, MacOS, and Windows. The boys in the band were free to continue NIK Collection and did so. Some have moved on to join Skylum contributing their talents to Skylum’s Luminar family of photo rendering tools. Continue on to learn about use of Luminar in a casual photographer’s workflow.
Computational Photography
Computational photography replaces many of the old processing arts with linear or nonlinear transform based processing and color mapping techniques. A matrix with one element per pixel represents the image. In reality, multiple matrices are used to represent luminosity and hue. One of several color models is used. The image is processed using similarity transformations in which the image is pre-multiplied by a transformation matrix and post-multiplied by the transformation matrix inverse. The similarity transformation preserves the shapes described by the image matrix and also the overall image luminosity.
Other transformations operate on small blocks of pixels to enhance image detail, remove small imperfections, etc. More complex transformations may be used to correct for lens aberrations or blur. Haze and fog can be added or removed. Color may be corrected or altered to mimic a favorite film by using a color look-up table to determine a replacement color for each pixel of the image. Color may be quantized to bring out image features. These pseudo-color techniques are used to bring out features in low contrast images and in thermal images.
The Role of Artificial Intelligence in Luminar
When Luminar AI opens an image, it uses artificial intelligence to identify the image subject and technical characteristics of the image. Based on this analysis, it recommends a family of editing templates to use with the image. This recommendation pitches several feasible styles or looks for the finished product based on subject, image feature objects, image background, and hue, saturation, and luminosity of the dominate areas of the image.
Luminar Templates are more than saved presets. Rather, they are saved guidance for the each of the editing tools in Luminar AI. Each tool, in sequence, performs additional analysis and performs its transformations based on that analysis. If you will, the template controls the strength and parameters of the changes that the tool will make. A “fader” adjusts the strength of each editor. Adjusting the fader often has a progressive effect but not always. Slowly adjust the fader looking for a sweet spot or the best appearance. Often times, a fader will have limited effect on the image appearance. Revert these using the undo tool on the group pane.
Each of the operations is “orthogonal” to the others, that is, changing one does not upset the others. You can work down the tool bar from top to bottom adjusting for best appearance. I normally choose the template, adjust the master fader, then review and adjust the composition, light, structure, details, and mood (changes color map).
I have found that the Details tools are best adjusted in the order shown, small, then medium, then large. Small adjustments are best. Heavy handed use of these tools and the Structure tool will produce visible artifacts in the image. When in doubt, just a smidgen of this or that.
If I find that I’m using a particular combination of adjustments often, I can open the template, click edit down at the tool bar bottom, make my adjusments, and return to the tool bar bottom to save the edited template. Then, I hop over to Templates, pick My Templates, find the new template, and rename it.
Luminar Marketplace
Skylum operates a marketplace in which photographers offer templates, color lookup tables, and textures for sale. The grouping and naming of these can be quite creative. Most have a low price so you can take a flyer on them. And all can be adjusted to your preferences or image style and saved as new templates.
Luminar can swap out a sky!
Luminar can replace a boring sky with an interesting one and it can put images in the sky. Fancy a pterodactyl terrorizing visitors to boardwalk under a Ghost Busters apocalyptic sky. Clickty click click and it is done. And the scene relighted for the light sources that changed in the sky. And shadows ray traced in. Fancy! All of the masking needed to separate the sky from the foreground is automated. Matte generation is automated. Compositing of the background image with the foreground image is automated. The result is good but not quite perfect. A careful look at the image will show some artifacts at the boundary between the foreground and sky. But it is good enough for Twitter!
Luminar Family and Skylum Business Model
Luminar is SkyLum’s premier product. Each year or so, they release a version under a perpetual fee for service license and will make bug fixes to it during the first year following release. Next year, they’ll release a new major version. Twenty-twenty-one was Luminar AI. Twentyl-twenty-two will be Luminar Neo. Product evolution has been rapid recently with the move from Lightroom style pixel fiddling to the sort of processing NIK, SnapSeed, and Apple Photos do.
Luminar AI was the first version of the app in which the use of the AI automation was intended to be the primary pattern of usage of Luminar. Luminar AI automates most of the edits we do using templates and tools. Skylum changed the product architecture to permit further development of the automated editing features.
Luminar Neo rewrites the rendering engine to better support preview, rendering, adding layers and compositing. A risky transform can be performed in its own layer and merged into the finished image if good or hidden or reverted if it went wrong.
Luminar Products are procedural
The Skylum Luminar family of products are procedural. Your original asset is preserved unaltered. Luminar records a sequence of image transformations that when applied to the original image gives the finished image. No pixels are harmed by Luminar.
Luminar keeps the editing procedure in a separate file cross-referenced to the original image. These are “hidden” in the sense that they are to be mainipulated only by the Luminar tools with which they are compatible.
Luminar Neo reworks the internal asset manager
That’s nice but it is also a Photos plugin and will support our current workflow that starts in Photos.
Luminar Neo rework of the rendering pipeline
Luminar has reworked the rendering pipeline to make it more efficient. They’ve probably done work to reconcile the Apple Silicon architecture which treats the image and vector processors as internal functional units rather than external devices. Since similarity transformations are long running matrix operations, there is likely some start and signal me upon completion mechanism that differs across the architectures. Neo probably improves the abstractions used for matrix transforms, especially those done in to preview editing operation effects.
Editing with Luminar AI
We have a lot of images like this that have potential to look interesting after a bit of work.
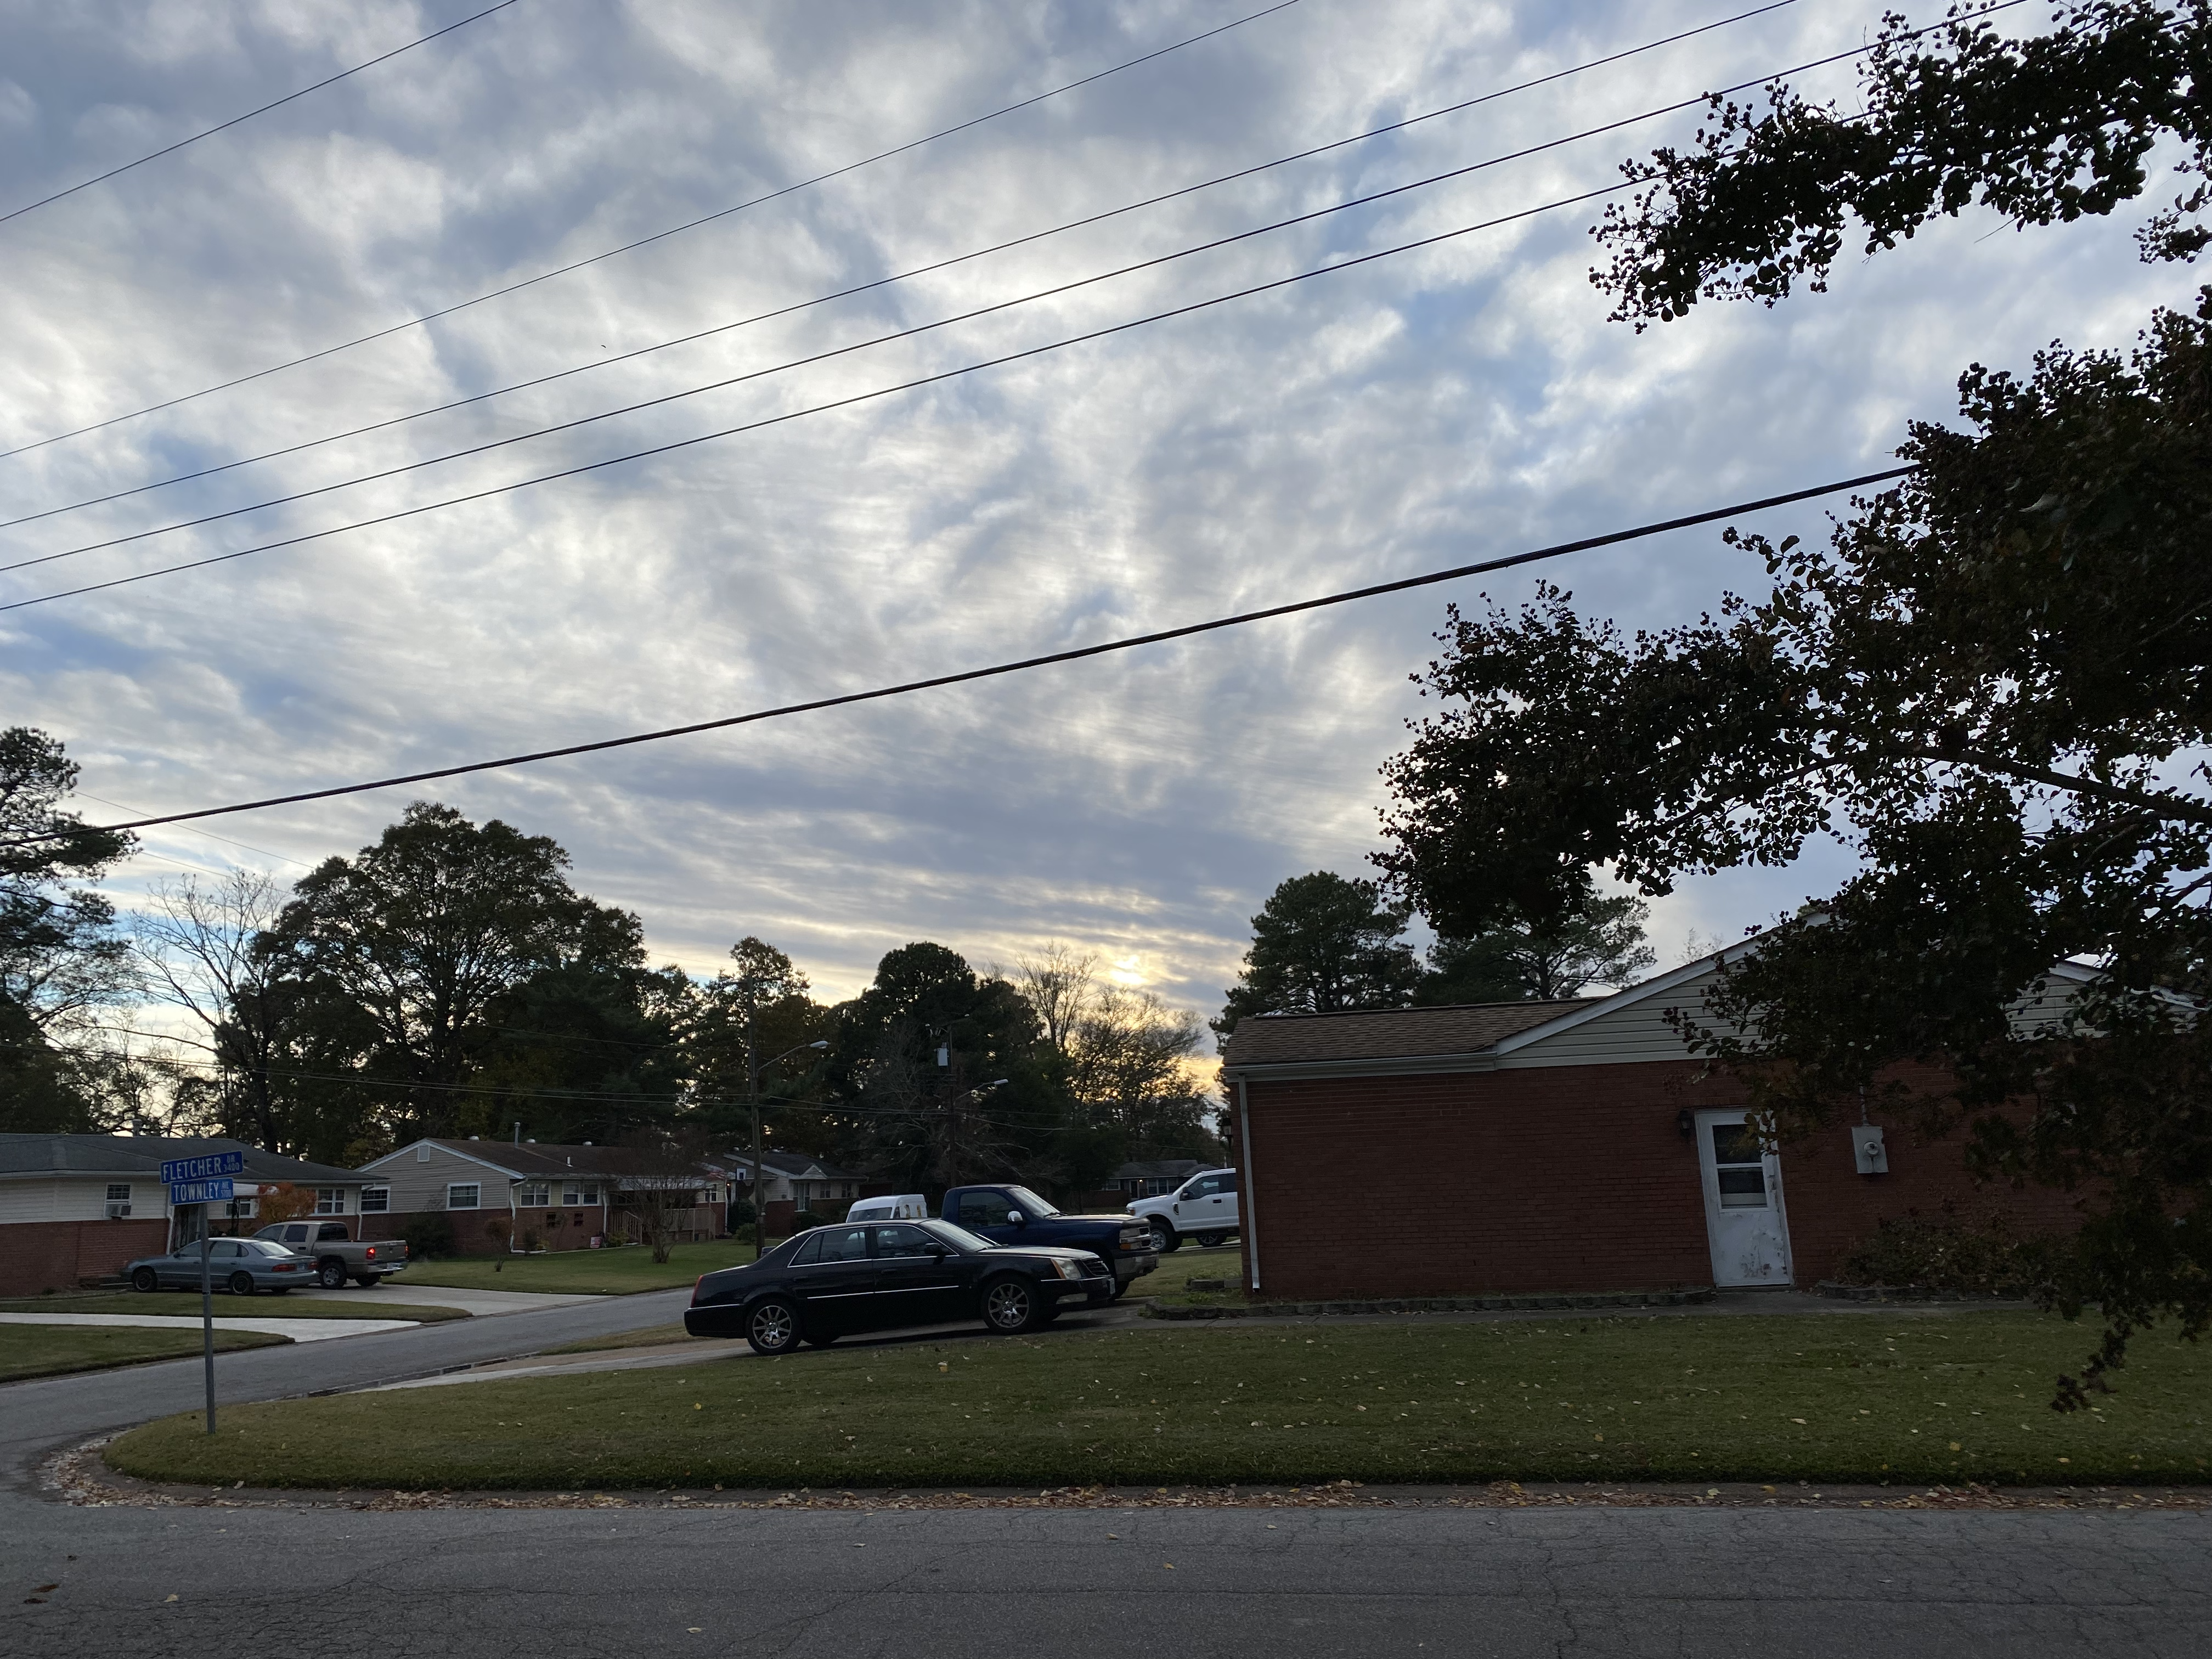
For this image, I’d like to do the following.
- Bring out the cloud detail somewhat
- Correct camera level
- Crop to 16×10
In Photos, we pick edit then open the exernal editors menu and pick Luminar AI. Photos forks off Luminar AI and passes a TIFF version of the image to it. In Luminar, I make the following changes.
- Apply the Backlit Sky template
- Apply Composition aspect change to 16×10.
- Adjust the image position within the crop
- Level the image
- Apply the Mood Red Trace
- In Light, decrease Highlights slider to -50
Since this is a common scene here, I saved it as a user template and renamed it to Backlit Gray Sky so I’d know its intended use.


You must be logged in to post a comment.