A few days ago, I watched a young gentleman comment on selection of amplification for Magnepan Magneplanar Loudspeakers. He is a Maggie fan and has owned a number of Maggies and paired them with various new and used amplifiers. Although a good presenter, he managed not to offer much insight into Magneplanar speaker behavior. So, I’ll tell you what I’ve learned in the 5 months or so this pair has been here.
Revisions
References
- https://www.cdc.gov/niosh/topics/noise/app.html
- https://youtu.be/d3IiH-SjhBE, a setup video from Next Best Thing Studios (YouTuber)
- https://apps.apple.com/us/app/audio-spectrum-analyzer-eq-rta/id1122398778, Spectrum Real Time Audio Analyzer
- https://youtu.be/UUciHyh34dI Present Day Productions on home and studio room treatment.
- https://youtu.be/hs1On87Ixe4 PDP on high sample rate recording
- https://youtu.be/-jCwIsT0X8M, FabFilter on oversampling in audio signal processing.
- https://apps.apple.com/us/app/spectrum-analyzer-rta/id490078884, Spectrum RTA used for these images. Perhaps the best.
- https://en.wikipedia.org/wiki/Nyquist–Shannon_sampling_theorem
How Maggie’s Voice Has Changed
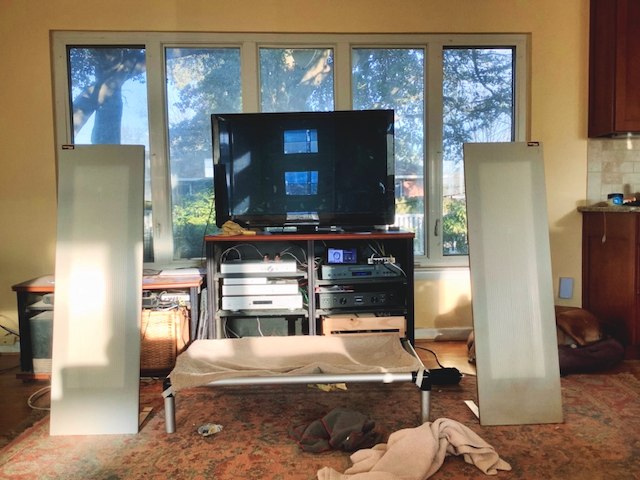
Over the 5 months or so my Little Ribbon Speakers have been in the lounge, I’ve tinkered with their placement a good bit. So we’ll start with this fiddling.
First, Rig Your Listening Room for Ultra-Quiet
My listening room has an ambient noise level in the 50-60 dbA range. The air con and things with fans in them influence the ambient noise in the room as do open windows or open door days for the dogs. The quieter the room, the more dynamic contrast you can perceive. In a noisy room, the quite bits sink into the noise. In a quiet room, they remain detailed. So I turned off the box fan. The air con still does its thing. I noticed that my media server is getting noisy so, eventually, I’ll locate the noisy rotating part and replace it. I think it may be a case fan. These can be isolated using rubber grommets and longer screws.
This spectrogram shows frequency on the Y axis and time on the X axis. The plot advances from right to left (backwards by the way) with amplitude color quantized.

Lines are characteristic of rotating machinery noise
This image is could be a visual from Hunt for Red October. Back in my day, we had a Spectral Dynamics SD-360 that produced spectrograms like this from the sonar audio patched to it. Jonesy, in our case Petty Officer Wilson, would divine the presence of window fans from similar images. Rotating machinery noise radiated into the ocean would appear just as the tonals (yellow strips) from this fan did. The surprise is the amount of broadband haze above the strong lines. That is air flow noise through the grills of the fan. So switching off pesky rotating machinery is a big part of improving the listening environment. In the 1960’s this was a well established art with General Radio being the primary maker of machinery vibration measurement tools and analysis techniques.
Today, Spectral Dynamics remains strong in the field under German ownership (no surprise). Today, there is an app for that for home hifi. Jet engine analysis requires professional kit from the likes of Spectral Dynamics.
Maggies Need Proper Placement
The temptation is to place Maggies even with the rack front. Do this initially and get over it. There will be many resonance peaks in the bass. Then bring them out in the room and most of the resonances will fade except for those associated with room modes. (More later.)
Believe the reported placement experience. Maggies sound best about 6 feet apart and 6 feet from the room front wall (the one you face while listening). The space off the front wall represents about 12 milliseconds of phase shift between the front face (toward the listener) and back face (away from the listener) sound waves. When too close to the back wall, the front and back waves interfere in unpleasant ways. The speaker will sound peaky in the bass. It helps that the area behind both speakers has similar stuff so reflections are similar for each. If your pair sounds honky, move them toward the listening position.
If you want to move the speakers closer to the front wall, experiment with diffuse reflection (book cases full of random width books) behind the speakers. This will introduce some absorption and some phase shift which should let you move the speakers closer to the front wall while maintaining a smooth voicing.
Maggies Need to Ripen?
It is my impression that the sound of my pair has changed since they have been here. Other than several Rocky induced face plants, run time appears to have reduced the amount of honking going on. Out of the box there appeared to be several resonance peaks that faded with play. This could just as likely be me learning their proper placement in my space. It takes several months of experimentation.
In the beginning, they had a number of resonances. The panel has what appear to be roofing nails strategically applied. Magnepan states that these smooth the sound by breaking up panel resonance modes. As the panel settles in, the residual resonances gradually fade away. In mid-February they are much smoother than they were in mid-September.
Maggie Voicing is Level Dependent
Maggies don’t like low playback levels. All of the little sounds they can reproduce clearly at 80 dbA vanish at 60 dbA which is on a par with the summer afternoon room noise in my lounge. The bass fades. Drumming stick transients loose detail and focus. If a record’s tonal balance sounds off, increase the playback level to the 75-85 dbA range. This is a loud-ish but safe listening level for prolonged listening. Below 70 dbA, Maggies sound bass shy to me.
This is a very pronounced effect. Maggies sound best playing at 80 to 90 dbA, or to put it another way, with about 2.83 volts of drive. Maggies are rated at 85 dbA at one meter with 2.83 volts of drive. Drive is specified as a voltage rather than a power as voltage is easily measured while power is a function of load impedance, nominally 4 ohms for Maggies. I suspect that they are designed to be happiest in this region.
Measure Level
When the Maggies first arrived, they sounded off. They were bright and a bit brittle, usually a symptom of over-driving them. I turned them down and they became well behaved. I later obtained a level meter from NIOSH, the US National Institute of Occupational Safety and Health.
This is a free iPhone app that uses the built in microphone to make sound pressure level measurements and to compute acoustic exposure. Originally developed for use in the mitigation of noisy work spaces, it is very helpful as a tool to determine a good listening level for home audio-visual systems.
Although not calibrated, the sensitivity of Apple iPhone microphones is easily characterized and is consistent from instrument to instrument. This allows NIOSH to make a fairly accurate application. I found that I liked to listen at around 80 dbA at my listening position.
Basic Room Acoustics
Room acoustics affects music playback in two ways. First, reflected sound mixes with the direct sound at the listener’s ears. Reflections arrive later making the sound muddy. Second, room standing wave modes reinforce some frequencies making the music sound peaky or overly honky. Bass instruments like to honk. One note in the scale will stand out from those around it in the scale. A bebop style bass solo or a bass playing in harmony with the melody is a good place to hear resonance peaking.
We’ll take the room shape, ceiling, floor, and wall materials as constraints. Treatment starts with selection and placement of furnishings and strategic use of treatment devices (absorbing panels and diffusing panels) to clean up lingering reflections and resonances.
Absorption panels can easily be made at home with hand tools and a power drill. Most sheet goods products companies make acoustic absorption materials and salvaged ceiling tiles may be used. Just make sure that the fire code looks favorably on the materials used. Do not use furniture foam or other foam panels. They are very combustible. The first Present Day Productions video shows how to make panels from home center sheet goods.
Treating the Room
In home settings, found objects may be used for room treatment. A couch or loveseat makes a good listening perch. Corner lounge chairs make good absorbers to reduce corner reflections at ear levels. Book shelves with random depth books make good diffusers. Area rugs reduce floor reflections. Fiddle with furnishings and furniture placement before adding room treatments.
Adding Treatment Devices
Furnishings can provide basic treatment of the space but some spot treatment could be needed. Treat the listening position first reflections. The side walls reflect direct path sound toward the listening position.
To improve clarity you need not treat the entire side wall, just the spot where a mirror shows the speaker face at the listening position. Move the mirror back and forth at seated head level to locate this part of the wall. Place an absorption panel there.
The Present Day Productions video[4] explains how to make absorbers from home center materials like ceiling tile or rock wool panels, framing lumber, and acoustically transparent cloth. Decorative cloth may also be used as a covering.
Room Resonances
Room resonances result when a wavelength fits between two parallel surfaces in a room. The air in the space resonates. The trick to eliminating room resonances is to make rooms without parallel surfaces. For most of us, room shape is a constrained by original design and construction.
Accepting the room shape as a constraint, we put absorption on opposing surfaces. A rug on the floor. Acoustic tile on the ceiling and acoustic panels on the opposing wall. Both absorbers and diffusers may be used. Sky line diffusers can be a decorative element when made from wood blocks. They can be constructed from common building materials. Computer programs are available to compute the block heights and placements.
Alternately, we can use a bit of room equalization in the playback chain. Roon has the ability to do this. I have one in the 150 Hz region that I’ve elected to treat by dialing a bit of equalization into Roon for that playback channel. I used a spectrum analyzer to locate it in frequency. Standup bass and bass guitar were exciting this resonance making them sound a bit honky in the C-3 region. So I added 3 db of cut with a Q of 1 and a center frequency of 150 Hz. Just a tad.
Things still sounded a bit off, so I moved the center frequency of the first cut up to C-4 and added a second cut near C-2 (US counts from 1, UK reduce by 1). This gives the compensation shown below.
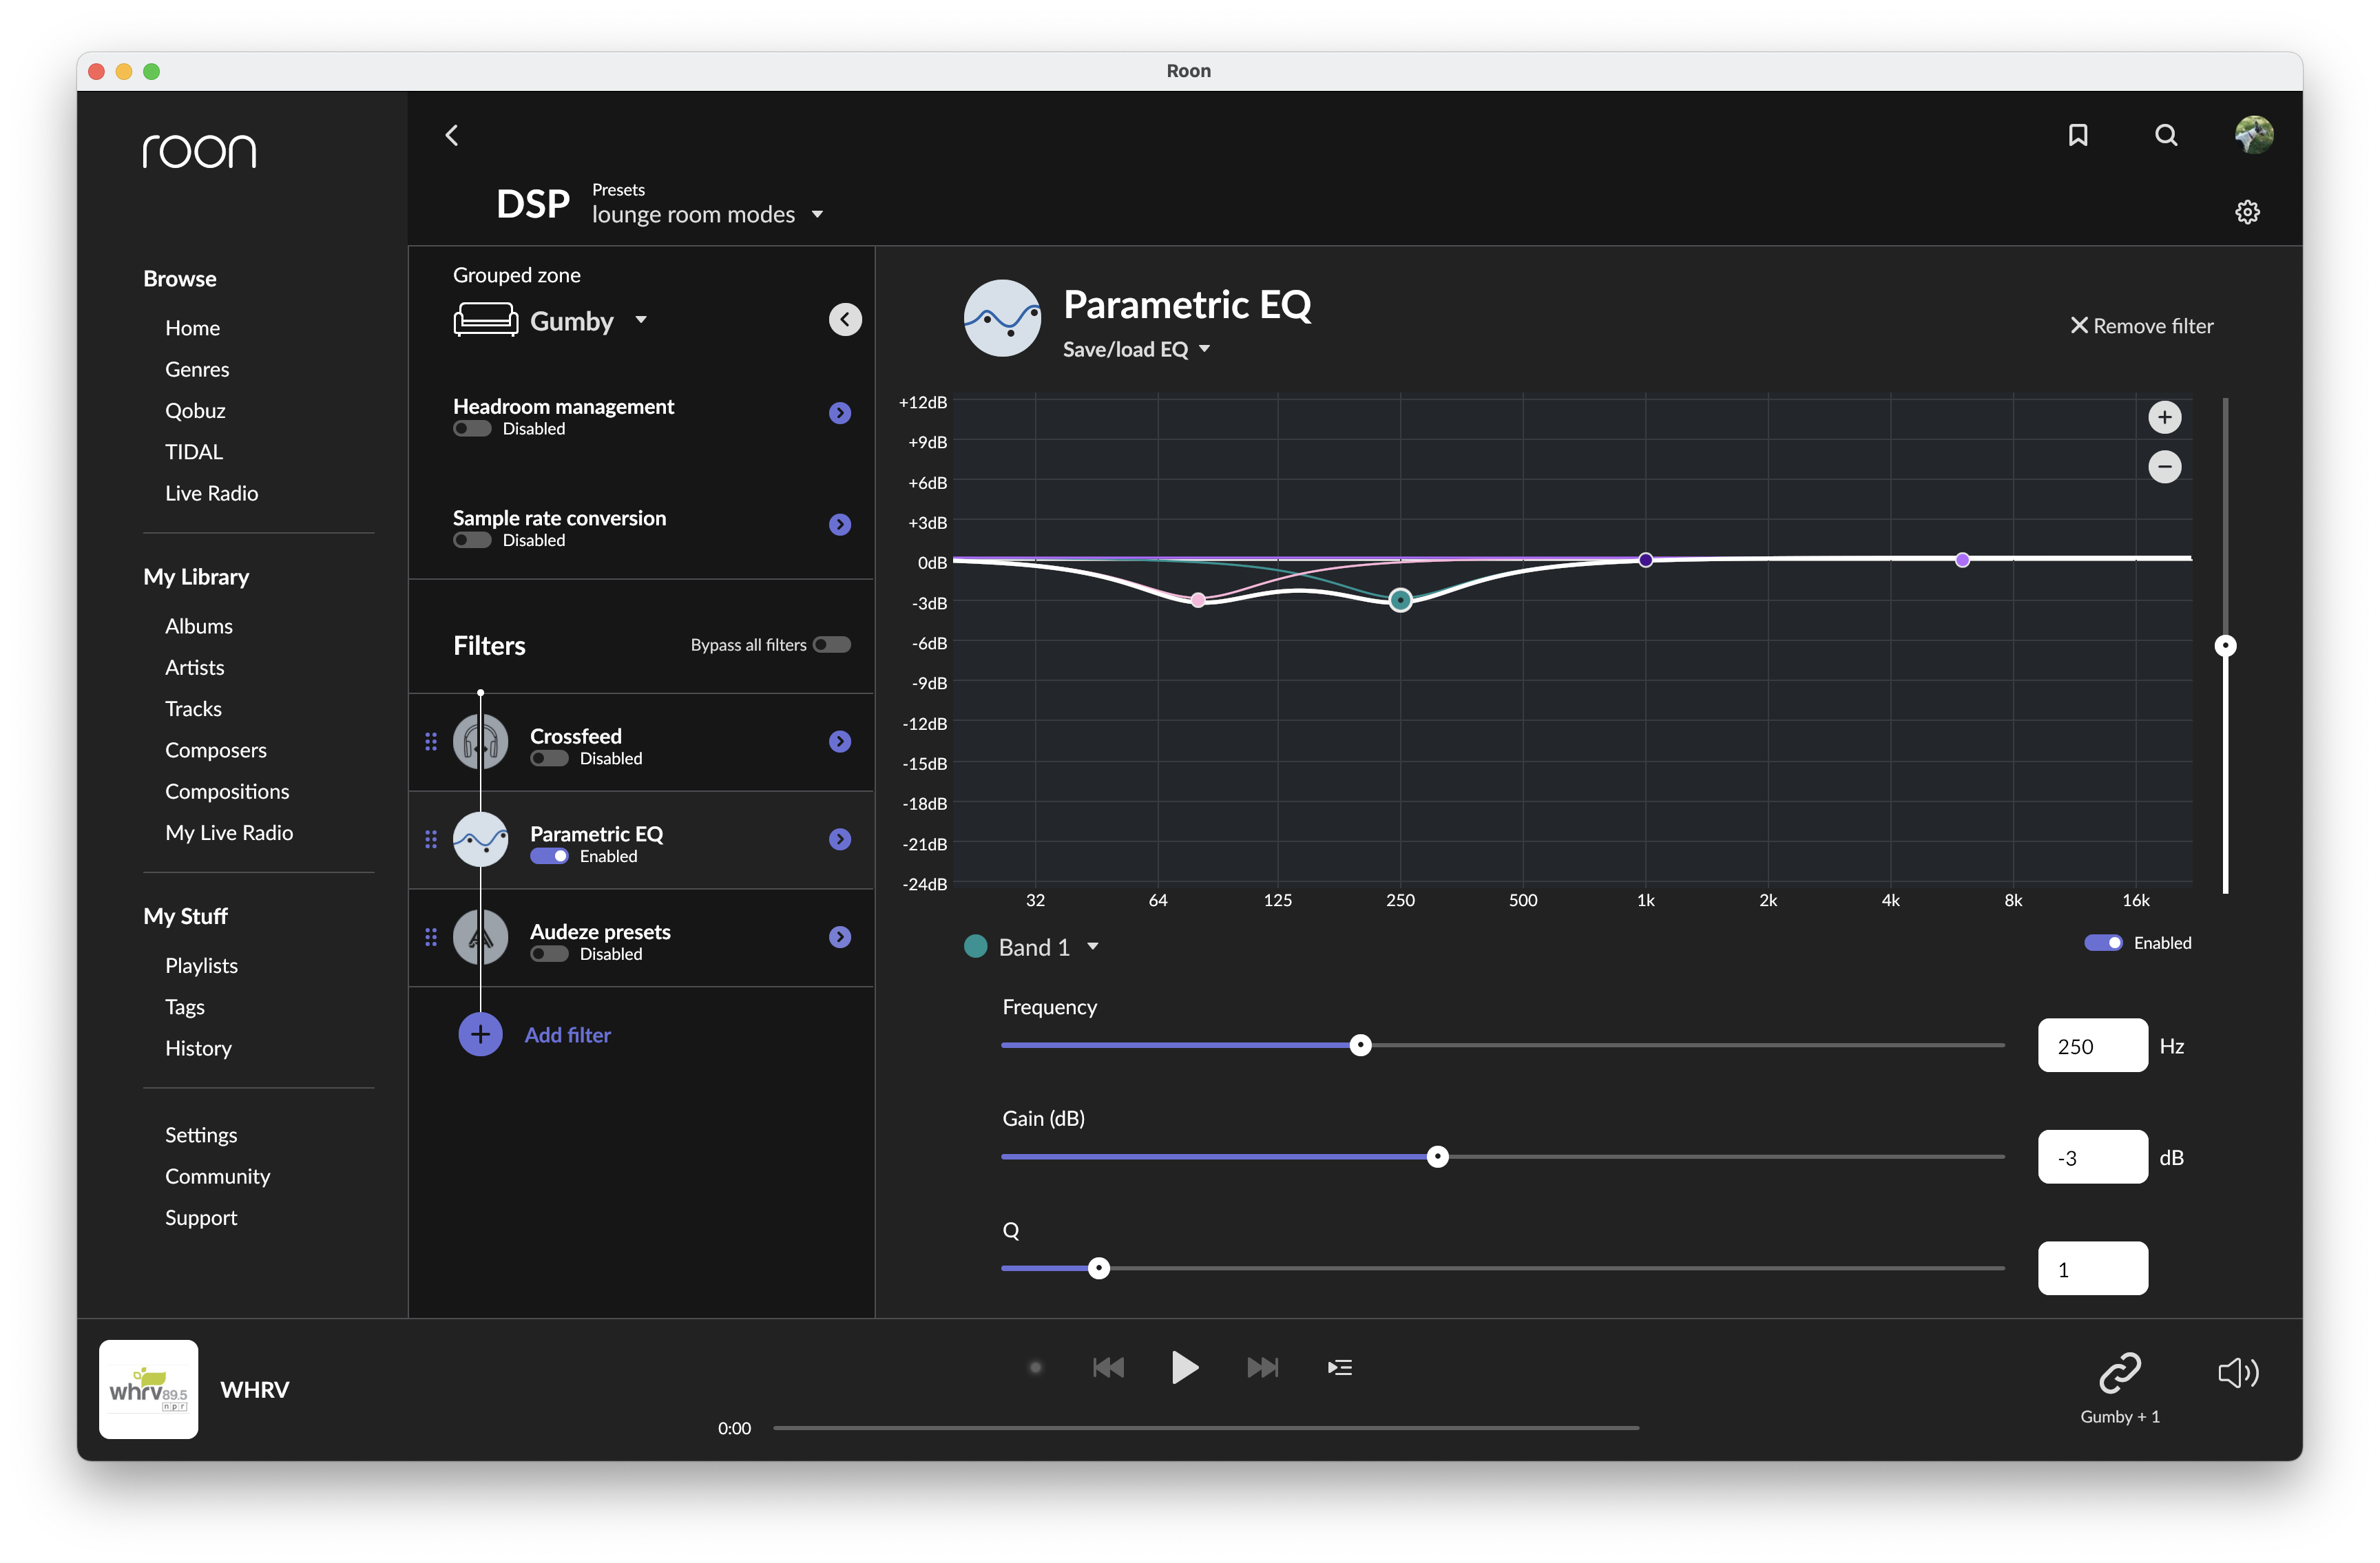
You can’t get this level of precision with preamp tone controls. The equalization needs to be tailored by selecting the center frequency and the amount of cut and the “quality” or sharpness of the filter. The Roon filters are very similar to those in a mixer channel strip and are subtle in their effect. If you’d not heard the music without, you wouldn’t know they were there.
I’ve saved this particular combination as a preset in the preset library allowing me to recall it. The low frequency cut is for Tivoli, a table radio similar to the old KLH and Advent table radios. A HiFiBerry DAC feeds the Roon stream to it. This inexpensive radio is full of bass resonances that the small cut helps.
I used the spectrum analyzer to locate the peaks.
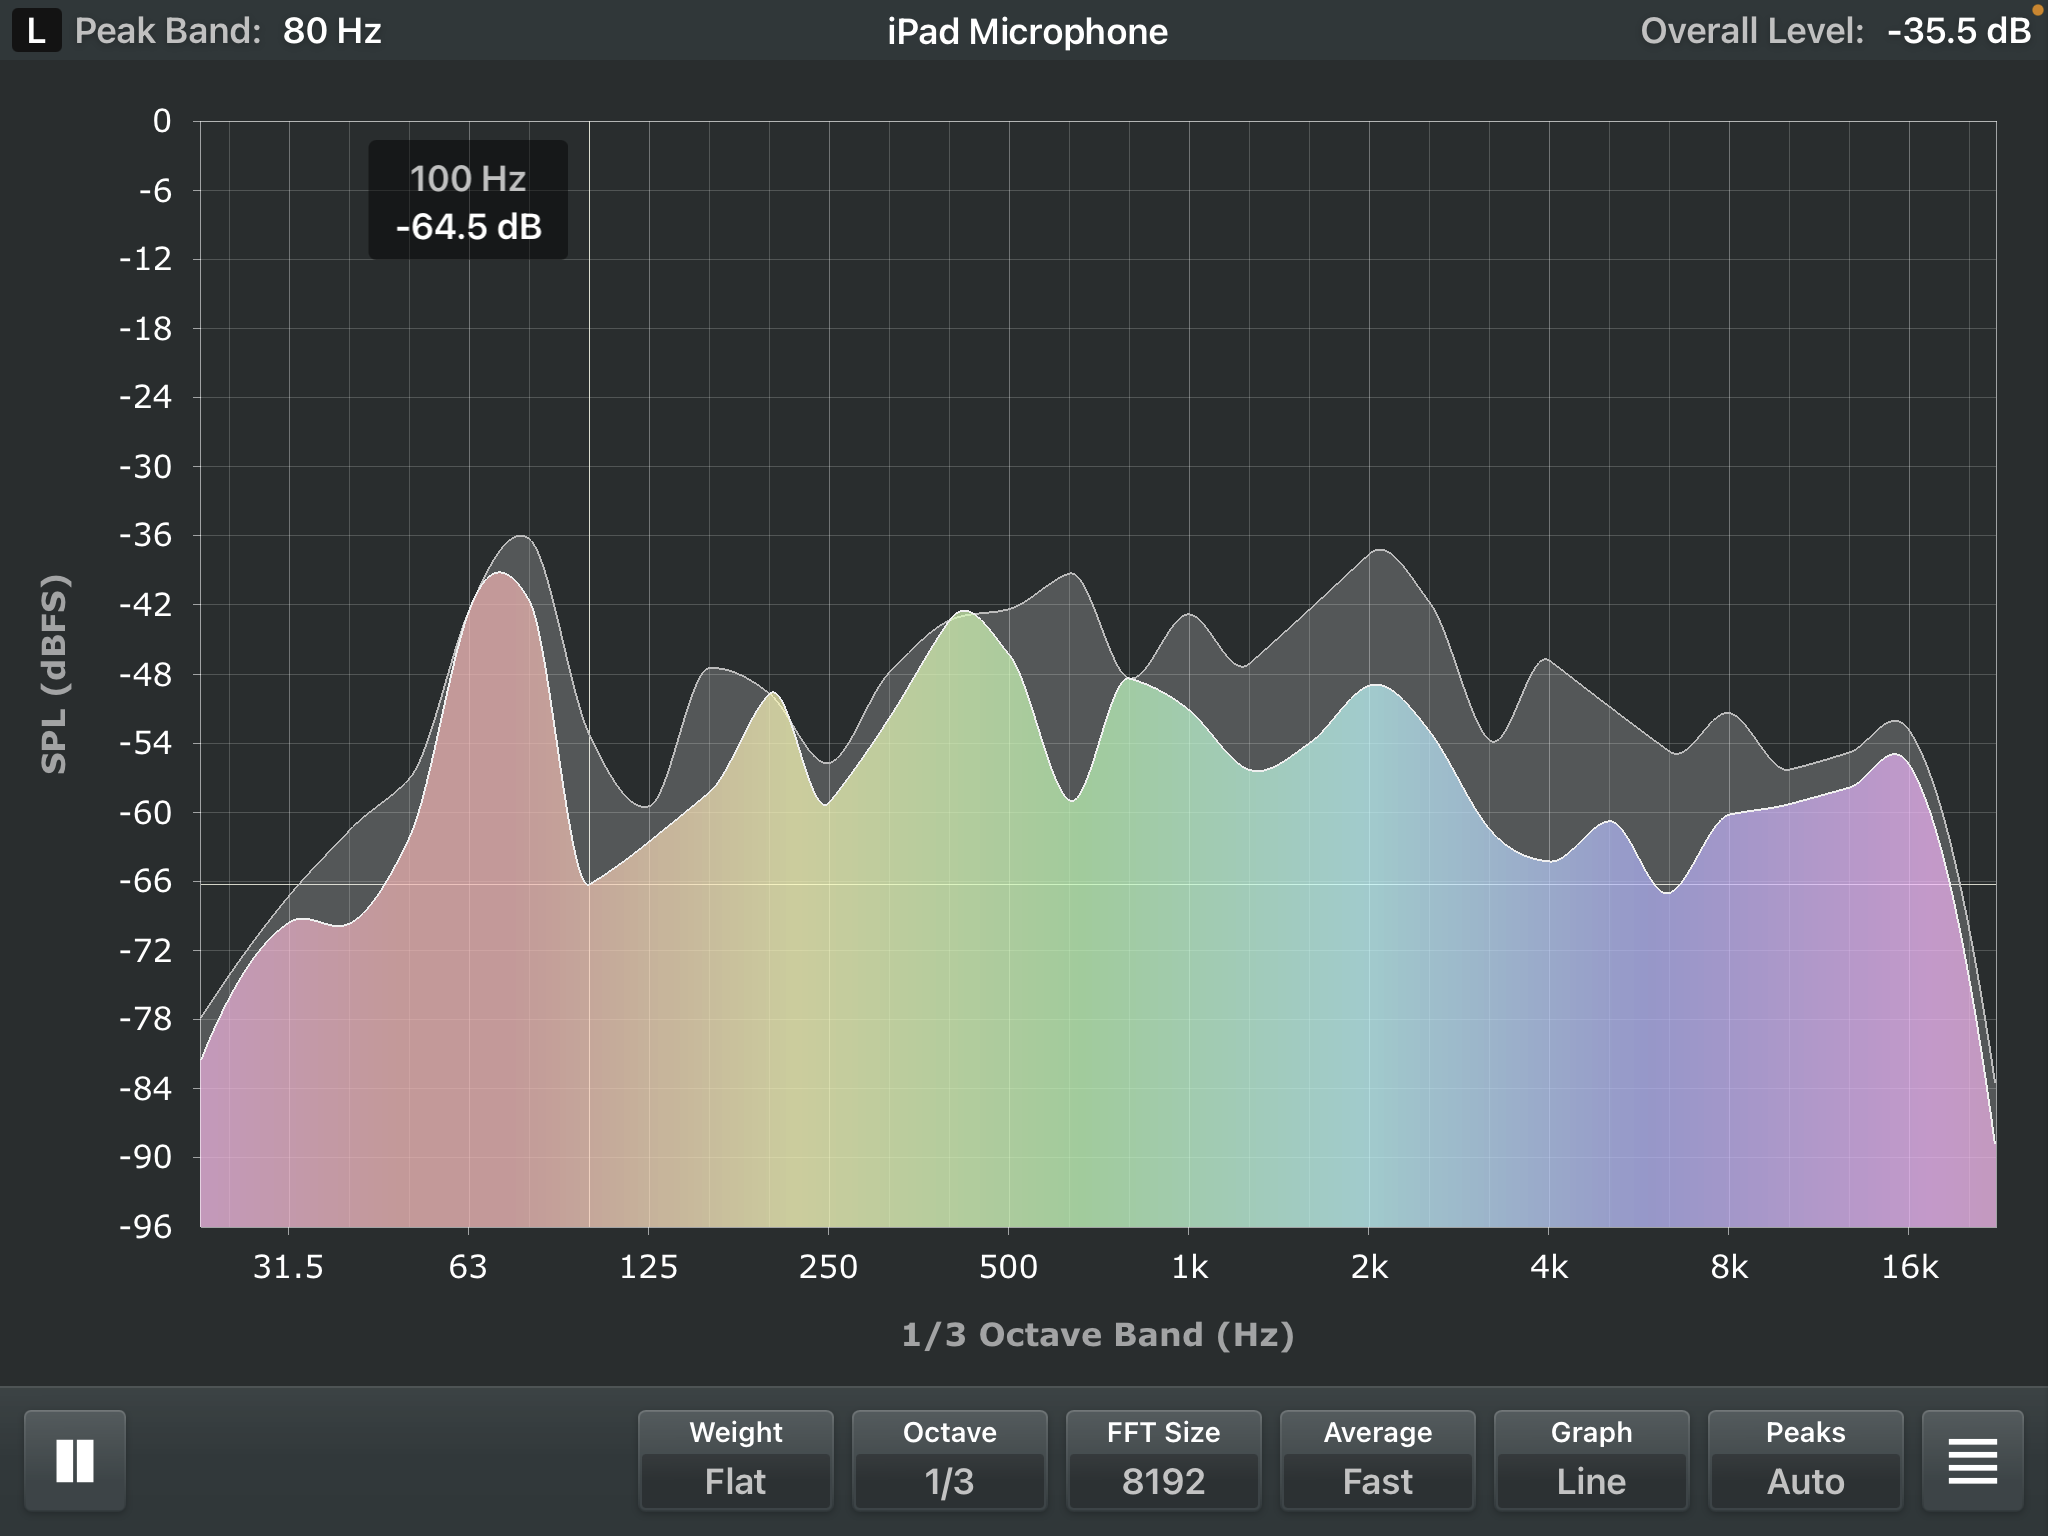
Unfiltered
This actually sounds pretty good. The bass part here is down around C-2 and sounds like it belongs. The next image shows the same track with the equalization active.

Filtered
You can see that the C-2 peak is about 6 db lower. The shaded area is a bit of averaging. The ghostly area is a recent peak. The bass note is -36 before and -42 after. Filter center frequency was about 80 Hz and 250 Hz.
Suspicion of High Definition Mixes
HD audio is all the rage among audiophiles of a certain stripe. I’m beginning to suspect HD audio is evil. An encounter with Teaser and the Firecat raised my suspicions that publishers monkey with the HD mixes to make them stand out. The Qobuz 192/24 HD version of this record sounded like Mike Moffat with a burr under his saddle. I didn’t make it through the opener. I suspect that this painful mix was deliberate because the market for HD reissues is largely affluent Boomers with some high frequency hearing deficits. I can hear the A&R folks telling the mastering engineer to brighten it up and make it louder and brighter so geezers will buy it.
I played my FLAC/ALAC transfer of the original CD. Much better. The HD was bright, harsh, over-loud like it had been manipulated to impress the audio nervosa crowd. Future purchases and library adds will be the regular release or the 48/24 version. You really can’t hear the extra bits but you can get a hokey mix or ultrasonic hash introduced by upsampling jiggery-pokery. Mark and James of Present Day Productions explains in What Sample Rate Should I Record At. [5] FabFilter goes on a deeper dive in [6].
High Sample Rates Have a Use
Digital audio systems work with band limited audio signals. There are a couple of ways to band limit the signal. The first is to use microphones that don’t respond above 20 kHZ or so. Since the signal is inherently band limited, no anti-aliasing filter is needed on the input.
If the signal source is not intrinsically band limited, recording engineers use a high order filter of about 20 kHZ. The sampler would run at 44.1 or 48 kHZ. But to be adequately band limited, a high order filter must be used. High order filters can have ripple in the passband and can have unpleasant phase behavior that adversely affects a recording’s ability to present an image.
Instead, if we sample at 96 or 192 kHZ, a gentler, better behaved filter still at 20 kHz can be used. A nice low order Butterworth will be smooth in the passband and have linear phase characteristics going through the knee. These sound much better than a higher order steep-skirted filter. This technique works because the gentler 20 kHZ filter has an extra octave or 4 in which to achieve the necessary reduction at the Nyquist frequency (in this case, the playback sampling frequency).
We then decimate in time (use every 2nd or every 4th sample) to drop down to 48 kHZ and work with decimated sample stream. The sample stream is bit perfect to the original. We’re using a half or a quarter of the original samples but the Sampling Theorem [8] ensures us that they are necessary and sufficient to represent the original band-limited waveform and to reconstruct it for playback. If making CDs, we would sample at 2 or 4 times the Red Book CD rate. Interpolating from 96 kHZ to 44.1 kHZ would introduce ultrasonic artifacts. The FabFilter folk demonstrate this in [6].

You must be logged in to post a comment.