Roon and TrueNAS 12 coexist nicely. Here at Dismal Manor, I have a TrueNAS 12.0 server that has two jobs, to serve music and to provide Time Machine storage for MacOS Big Sur. In this episode, I will describe the TrueNAS configuration used here at Dismal Manor. This arrangement is not particularly elegant as I was learning to manage TrueNAS as it was evolving from FreeNAS 9 to the current TrueNAS 12 core.
References
All references were retrieved on Ground Hog day. Well across the date line.
- https://www.truenas.com/docs/hub/intro/glossary/
- https://www.truenas.com/docs/hub/initial-setup/install/firsttimeinstall/
- https://www.truenas.com/docs/hub/sharing/smb/
- https://www.truenas.com/docs/hub/tasks/advanced/virtual-machines/
- https://help.roonlabs.com/portal/en/kb/articles/linux-install
Pools, Volumes, and FileSystems
TrueNAS functions in terms of pools, volumes, and filesystems. As I understand it, a pool is a TrueNAS container that combines multiple physical disks in a manner that lets TrueNAS use them as a virtual block device. Within the container, TrueNAS can create a volume which behaves like a block device. The volume can contain one or more file systems. The pool can also contain filesystems. File systems can contain file systems. File systems may be exported as network shared file systems.

Use a volume when you want to limit the size of the dataset. When you create a volume, you set a maximum size for it. ZFS uses lazy provisioning. It will add blocks to the volume as needed until the size limit is reached.
Most of the time you will create a filesystem or dataset because the object is expected to grow and you want it to have file system sharing semantics.
Sharing in Apple Land
ZFS exports are always at the filesystem node level as identified by a filesystem path. This is in keeping with the original NFS model for which ZFS was designed to provide storage support. TrueNAS, to my knowledge, does not export block devices as a network service.
Dismal Manor is thoroughly modern so our Mac runs Big Sur. Dismal (our server) serves music, photos, and a couple of Time Machine spool volumes. Everything is in the primary ZFS Pool. Within the pool, individual datasets hold media, photos, and Roon Backups. One volume in the pool serves as the block device used by the virtual machine in which Roon runs.
The media dataset is further subdivided by iTunes (ALAC), HD Audio (ALAC and FLAC) purchased music from CD, HD Tracks (ALAC and FLAC) purchased music from HDtracks.com , and Qobuz (mostly FLAC but some ALAC) purchased music. It is only recently that iTunes and iThings tolerated FLAC and I’m not completely convinced that iThings like FLAC. So ALAC is kept separate for transfer to iThings.
The FLAC is kept separate by where it came from. HD Audio is FLAC from records. HD Tracks is media purchased from HD Tracks. Qobuz is media purchased from Qobuz, my current favorite source. The HD Audio is mostly direct purchases from artist websites, usually as media. The commercial services track purchases and allow transfer of media to a revived host in the event of media loss.
The figure below shows our shares. As you can see, the Time Machine spool is now SMB. There is a share for virtual machine installation media, one for Roon backups, and one for iTunes and other media, and one for photos.
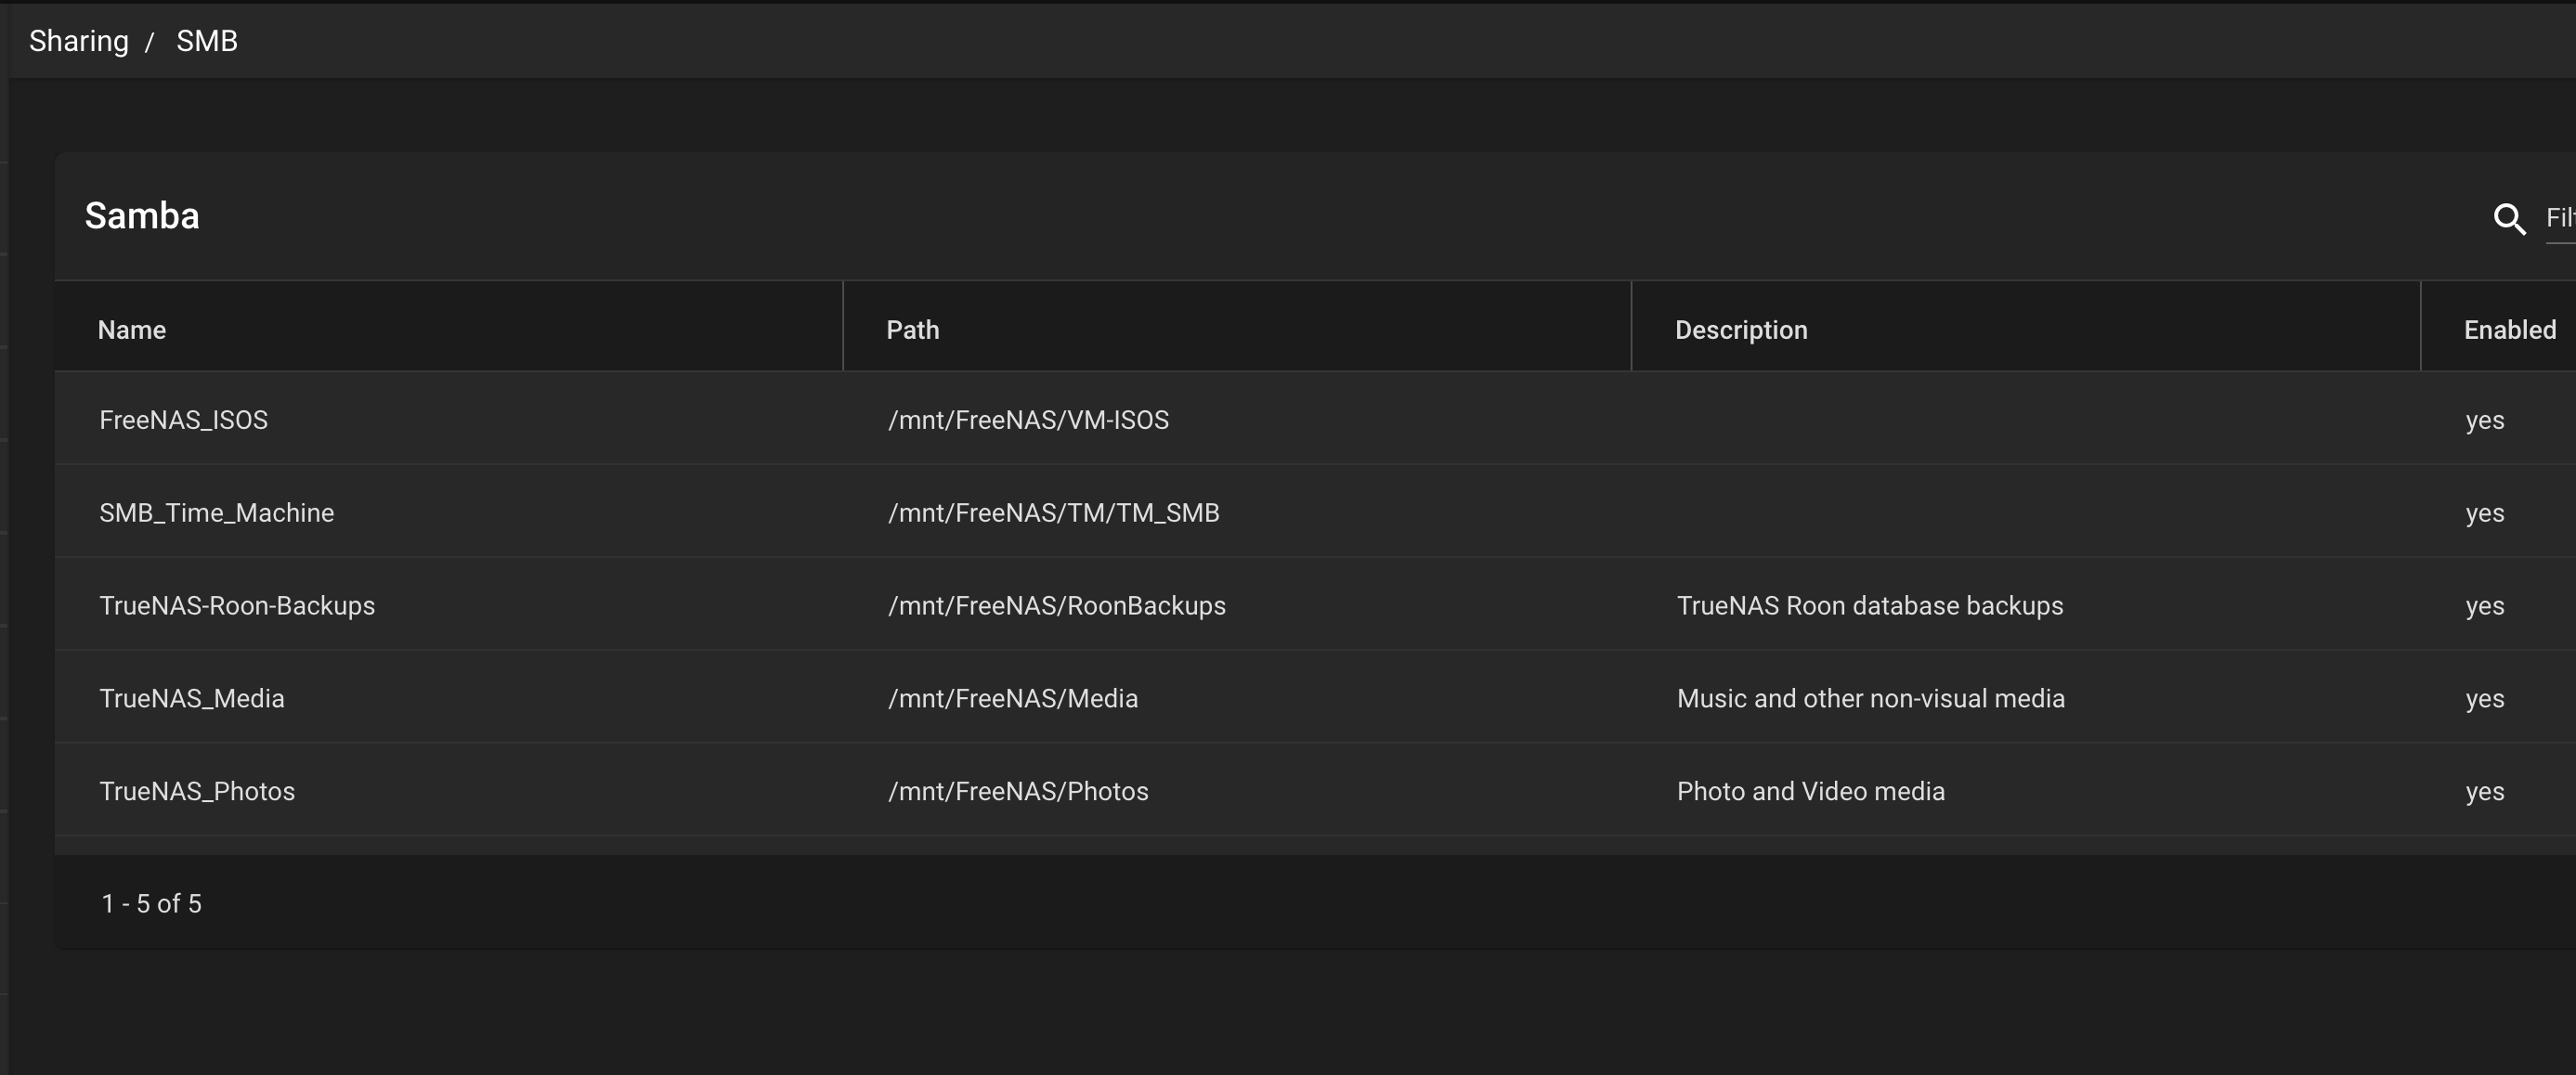
Photo storage for MacOS
The photos share is somewhat confounded by MacOS design. MacOS replication services expect the Photos AppLibrary to always be accessible (ie mounted at boot or is it login? Its Apple). So iCloud and the iThings do their thing to the thing-owner’s directory structure.
The Sony “real camera” is transferred twice, once into Photos App and a second time into ZFS photos file system. I’m slowly abandoning this practice as it is much easier to find an image in Photos, select it for editing, and pass it off to Luminar AI for editing.
Photos passes the raw file to Luminar. Luminar returns a TIFF with the edits back to Photos. As Firesign Theater was fond of saying, “When you are two places at once, you are no place at all.” It just became too hard to find stuff. Luminar has OK image management but for a hobby photographer, Big Sur Photos is champ.
The Roon Virtual Machine
Dismal runs a Roon virtual machine. In 2017-2018 I’d tried to run Roon on a Mac Mini running MacOS and that same Mac Mini running Ubuntu. Each time Dominion glitched us, I’d have to intervene on the Mac to get Roon up. Roon on the Mini was restarting before the shares came up so the mounts would fail.

So, I installed Roon in a VM on Dismal. This works nicely as TrueNAS starts the virtual machines after the file services are ready to go. The TrueNAS design enforces this sequence as hosting storage for zillions of virtual machines running Windows is a major TrueNAS use case. The data-less client rules in cubical land today.
This explains the ISOS dataset shared with Trey, this iMac. We fetch the appropriate installation media, copy it to ISOS, and specify it as the VM installation media. Once the OS is installed (Debian server is a good choice but also Ubuntu), download the Roon installation script and follow the Roon procedures.
Create the VM following the reference. Boot Linux from the ISO image and run the installer in the normal way following the TrueNAS VM creation instructions. Once the VM is ready, open a shell in the VM’s web interface and add the required packages to the distribution. The Roon installation procedure clearly explains the packages needed and lists them in an order that satisfies dependencies.
Once all of the dependencies are aboard, fetch the Roon installation script and run it as described in the Roon instructions. It will set up Roon as a service on the VM.
Roon Storage Organization at Camp Dismal
Then follow the Roon setup instructions to add media, create a place for configuration backups, etc. Once installed, your 2 week trial starts. The figure below shows how we configured our storage

Our music storage is partitioned into separate trees for iTunes media (mostly ALAC, but stuff that may be transferred to an iThing), HD Audio (mostly FLAC), and Q0buz purchases (mostly FLAC). I keep these last two separate so I know what came from where should something need replaced down the road.
Note that Roon Focus will let you select items by format and also by where they came from. Click Focus On to bring up the Focus view. Toward the left, there are buttons to refine the focus. Bring up this view, then slide left to bring up the format inspector. This will let you identify Tidal tracks, Qobuz tracks, etc. You can also view by location in the local library.

Roon can also run things down by location using the Inspector.

Once you have your search criteria set, you can export as a list for record keeping purposes. This is a useful thing to do occasionally should your library go missing. But ZFS is robust and you are satisfied with your backup. Aren’t you?
Backups
TrueNAS replication is a wonderful thing. Together, Snapshots and Replication let you deal with most file system misfortunes. If you accidentally delete something, it can be retrieved from a prior snapshot. If the local media becomes corrupt, the replication media should have a sound copy.
The purpose of snapshots and replication is two fold.
- Provide protection against disk failures
- Provide protection against user mistakes
- Replication is a convenient way to fill a newly commissioned server
Keep in mind that snapshots and replication may not protect you from the local processor slowly going batty. This is extremely rare. Disk problems are most common, memory problems less common, and processor problems least common. I’ve yet to see one in integrated processors.
Back in the old days, our trusty work CDC 7600 started misplacing files. OS required files would go missing. The divide unit was miss-calculating hashes so the filer was retrieving random data when a disk directory record was expected. The OS (CDC Scope 2) would trap. The techs living inside the 10×10 paneled office quickly tracked down the divide unit as the problem. A fix took a bit longer as the divide unit was several racks of cigarette pack size modules and cabling to troubleshoot.
Here at Dismal Manor we have the following backups in place.
- Time Machine to a ZFS share.
- ZFS pool replication to a second ZFS pool inside the server. No fancy raid here but ZFS checksums and checksum verification.
- BackBlaze backup of the Mac disk to an off-site facility
Note that we don’t treat iCloud storage of photos or data as a backup.
Copy on Write?
Both APFS, the new Apple File System, and ZFS are copy on write file systems. That means that when a file is updated, only the changed blocks are written to disk. The unaltered blocks remain as the were. So both ZFS and APFS permit retrieval of earlier versions of a file as recorded by snapshots. APFS is snap shotting for Time Machine. Time Machine, like ZFS replication, transfers the most recent snapshot to the backup device by writing just the changed blocks. Pretty slick? Yes actually. So Time Machine is writing to the ZFS SMB_TM dataset which is in turn backed up by ZFS replication to a second pool in our server. And just the changes are transferred!

You must be logged in to post a comment.