
Apple MacOS Ventura Time Machine and TrueNAS Core 13 are a match made in heaven (well Unix heaven). TrueNAS Core 13 combines the OpenZFS file system, FreeBSD, and an IXsystems user interface as a convenient home or small office file system server for people knowing just enough UNIX admin to be dangerous. This article outlines the work flow for creating a TrueNAS Core spool volume for a MacOS user client and user account on that client.
Revision History
- 2023-01-11 Original
References
Why this post?
No Internet good deed goes unpunished. Back in 2017 when I first migrated from Drobo to TrueNAS (then FreeNAS) I wrote a TrueNAS community forum post about creating a Time Machine share and coaxing Time Machine to use it. Since I wrote that post, MacOS has been through multiple revisions including a major rewrite of the Apple File System. The end result of continuing development by both Apple and ixSystems is that TrueNAS is easily used as a Time Machine spool volume. In this article, I’ll review the work flow to do so.
Apple Changes
Since I wrote the original article, Apple has developed a new Apple File System, a modern copy on write file system designed to support SSD, HDD, and HDD with SSD caches. A copy on write file system works a bit differently than the older mapped file system HPFS that Apple had been using in MacOS. HPFS dates back into the ’90s or maybe the ’80s and the original Motorola 68000 Macintosh hardware. It was simple to implement. HPFS would allow a file to be extended or modified. When a file was modified, an application read the block to be changed into working storage, the application changed the contents, and the application wrote the changed block to disk. No history was maintained.
Apple File System works a bit differently. The application still reads the block, modifies it, and writes it back. Behind the scenes, the APFS implementation checkpoints the file, creates a new version (directory entry for the version), writes the changed block to a free block on disk, and links it into the new version. After the update, 2 versions of the file exist, the original and the modified version.
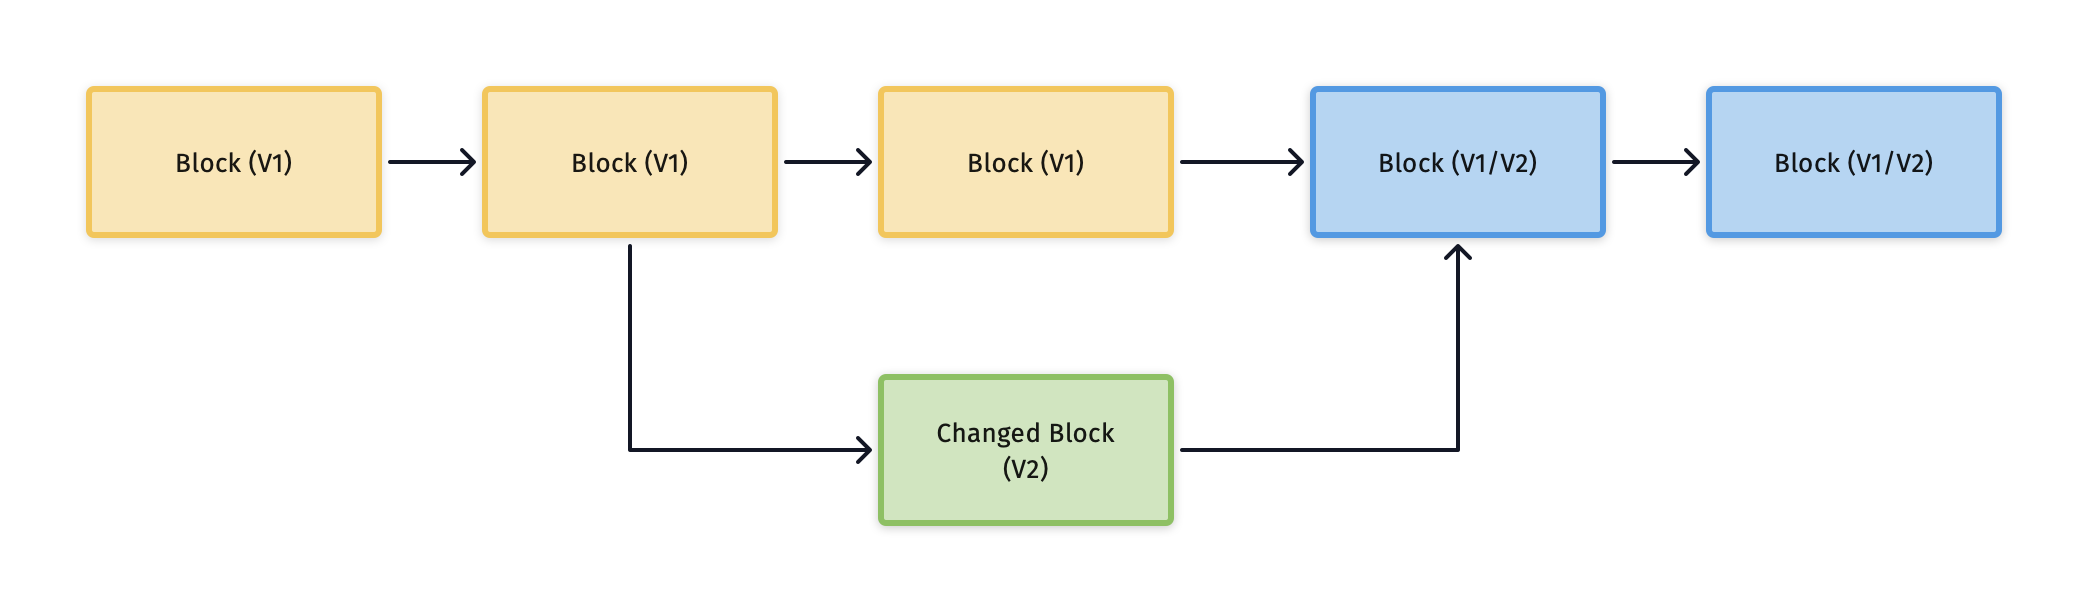
This scheme is more reliable in that the original file continues to exist without any change to its blocklist. To create the new file version, OpenZFS writes the new block to a free block on disk, copies the map data, replaces the changed block id with the new block id, and writes the updated metadata to disk as a new version of the file. So versions are cheap and fast, not OpenVMS disk-eating complete duplicates. Think of a file version as a snapshot of the file to which changed blocks have been added while preserving the original blocks and directory entry.
TrueNAS Changes
FreeNAS went through a number of changes to become TrueNAS. The biggest was that the architecture changed to allow TrueNAS to run both on FreeBSD and Linux in a cluster environment like those provided by the various Linux container subsystems like Docker. So a common code base supports TrueNAS Core, TrueNAS Enterprise, and TrueNAS Scale. TrueNAS Core runs on commodity hardware having ECC memory. TrueNAS Enterprise is run on rack mount servers. TrueNAS Scale runs in a commercial cluster environment. (Probably over-simplified but will do for our purposes). Each of the three versions uses the same OpenZFS core. ixSystems moved to OpenZFS because Linux now included OpenZFS as a standard core filesystem and FreeBSD had also joined OpenZFS which is now the one true ZFS outside Oracle Corp.
As an interesting aside, FreeBSD has a Linux subsystem that supports the Linux ABI (application binary interface). This allows FreeBSD (and TrueNAS?) to run a standard Linux image provided all the necessary shared libraries are present and of compatible versions.
The other big change is that ixSystems developed a new management framework based upon Python and shared across the 3 product tiers. But the two large-scale versions have different pages than those I’ll show in the following guide.
Core assumes use of local SATA or SAS storage using common small system controllers. Enterprise is designed for large scale SAS hardware and provides Storage Area Network services in addition to the common file sharing protocols. Scale runs as a storage service in the context of a large scale cluster in a Linux virtualization and containers environment.
Setup of a TrueNAS Share for Time Machine
Here, we’ll look at the local Time Machine environment used at Dismal Manor and walk through the setup of a TrueNAS filesystem and share for a single Time Machine client machine and user.
Dismal Manor Environment
The Dismal Manor system consists of the following critters.
- MacOS host running current MacOS
- A USB disk Time Machine volume (grab to evacuate)
- A TrueNAS Core primary server
- A TrueNAS Core secondary server (replication target)
- An internal single disk pool to which the secondary replicates
- Backblaze single host backup service
This scheme may not quite replicate the 2 here 1 somewhere else recommendations of professional admins but it comes close at the cost of $6K of servers and disks (mostly disks).

Configuration for First Machine and First User
MacOS is BSD at its core. Apple has added on many things but deep down inside, MacOS is a POSIX compliant operating system derived from FreeBSD back in the NeXT days. When Steve rejoined Apple as CEO, he brought along the NeXT people and code to develop MacOS X. So MacOS is inherently multiuser and multi-process. Normal MacOS runs a desktop and user processes for a user logged in on the primary display device (console). Additional processes run in the background and may run as users other than the logged in user. Or family members, each having an individual account, can share the machine.
But second user is just first user, change UID and user name, and repeat.
MacOS Users
Out of the box, MacOS runs a first login script that creates the first user account and sets it up as machine administrator account. MacOS uses FreeBSD pseudo command infrastructure for this purpose. The first user receives user number 1000, group number 1000, and is added to group Users. The second is 1001, the third is 1002, etc. User numbers are unique local to the machine but each machine on the network uses the same pool of numbers.
So if a household has parents and kids machines, parent 1 and parent 2 might be users 1000 and 1001. Kids 1 and kids 2 might be 1000 and 1001. So user numbers are not unique when multiple machines are present in the absence of a directory service like LDAP. Home environments don’t normally run LDAP for 2 reasons.
- Home needs a high priest to maintain LDAP but is unlikely to have one.
- Machines are expected to work at Starbucks without calling home to authenticate users.
So we must manually keep user numbers straight or buy into the kids being able to poke around in the parents backups. Fortunately, Apple has a fix for privacy. Each save set is encrypted by credentials unique to the combination of machine and user. So save set snooping is not possible. And TrueNAS encrypts the save sets at rest.
So, the first thing to do is to run down a list of hosts and the users of each host.
FreeBSD and Linux Users
Hey, sports fans, both FreeBSD and Linux do the same thing. During installation, they create the first user. Since the POSIX standard governs users for all 3, first user has the first user number 1000 and can optionally receive administrator privileges courtesy of pseudo. So Tom’s Mac has Tom, user 1000, Dick’s Mac has Dick, user 1000, and TrueNAS has Linus, user 1000. So, there is a bit of a conflict.
Perhaps the best way is for the household administrator to be the first user on the file server and all new family member machines (user 1000). The family member normally using the machine becomes the second user (1001). And TrueNAS has the administrator and a second user JoeUser (1001). Since each machine uses a separate FILESYSTEM and each user on the machine has a separate FILESYSTEM within the machine FILESYSTEM, everything stays separate as long as mount points don’t get crossed up.
Creating Time Machine Filesystems
TrueNAS is still settling on taxonomy for pools and the things they hold. A pool is a collection of disks that form a single logical volume. Using the terminology of the TrueNAS Storage UI, filesystems and ZVols reside within the pool. A file system grows dynamically using mapped on-storage structures. A ZVol has a fixed size and is normally used to create pre-allocated storage for jails and virtual machines. A Time Machine volume may be either a Filesystem or a ZVol. Use a filesystem if you expect the Mac storage contents to be relatively stable. Use a ZVol if it will be quite dynamic, for example, used for software development which can create multiple gigabytes of changed files with each build.

Dismal Manor organizes Time Machine storage by host and by host user as shown above. When a new machine arrives, I create a new FILESYSTEM for it. Within that FILESYSTEM, I create a new FILESYSTEM for each Time Machine user on that host. That structure appears in the image above.
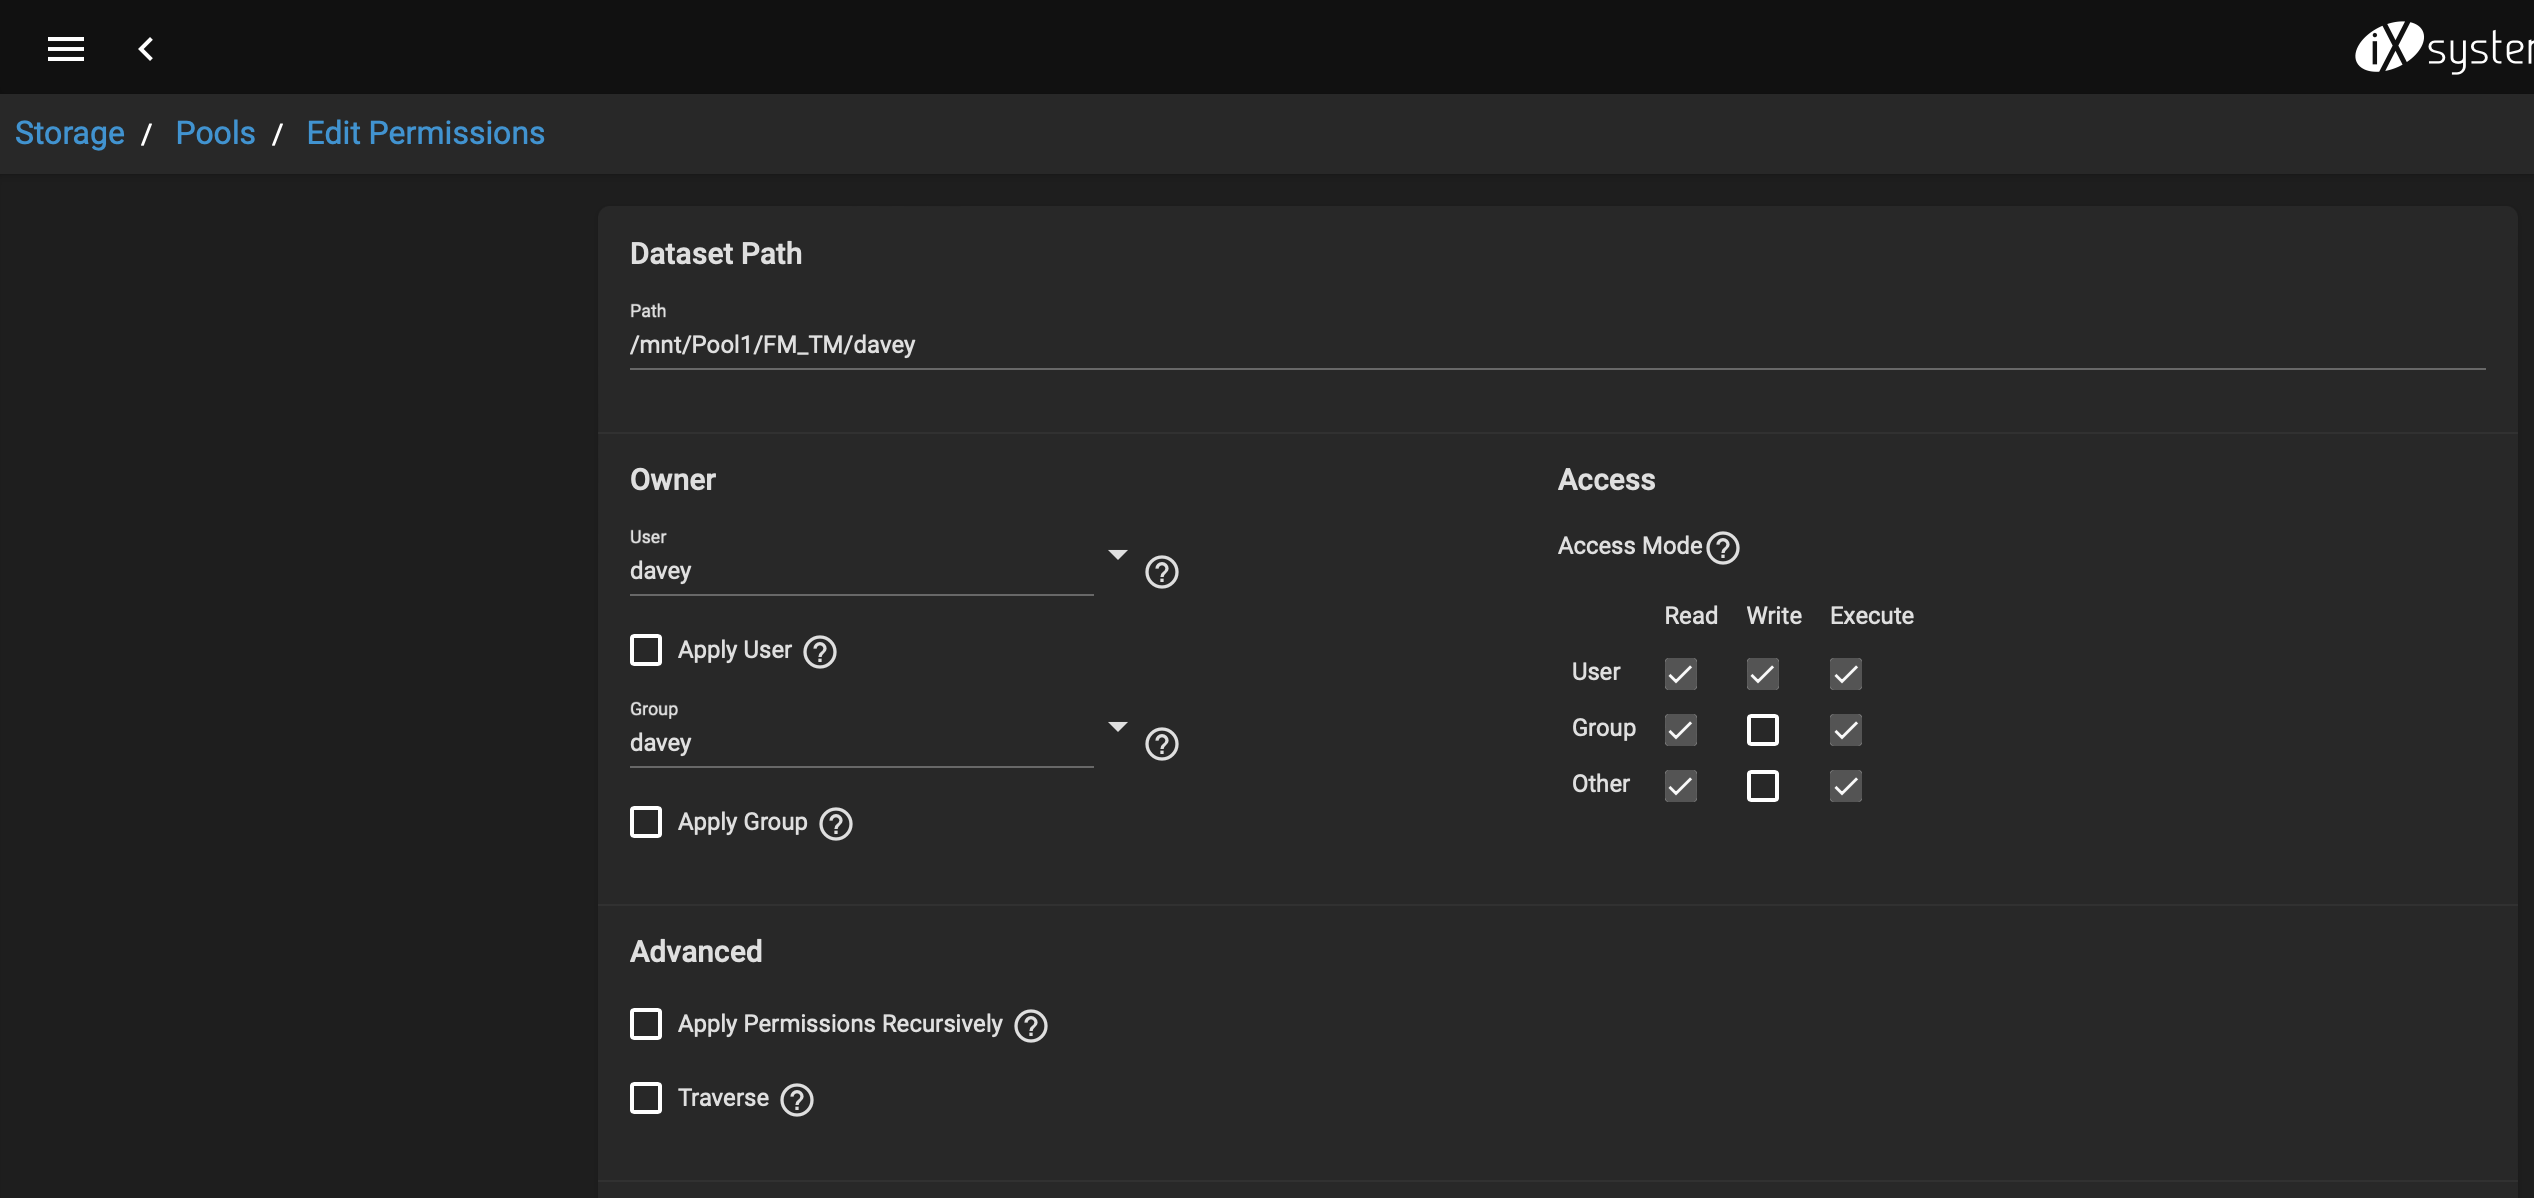
Set the user and group as shown below. The UID and GID match those used on the Time Machine client account.
Create the Time Machine Share
Create the Time Machine share as a Windows SMB share just like any other served by the machine. Select purpose “Multi-user Time Machine” to correctly set the sharing attributes for Time Machine.
Mount the SMB Share and Add to TM
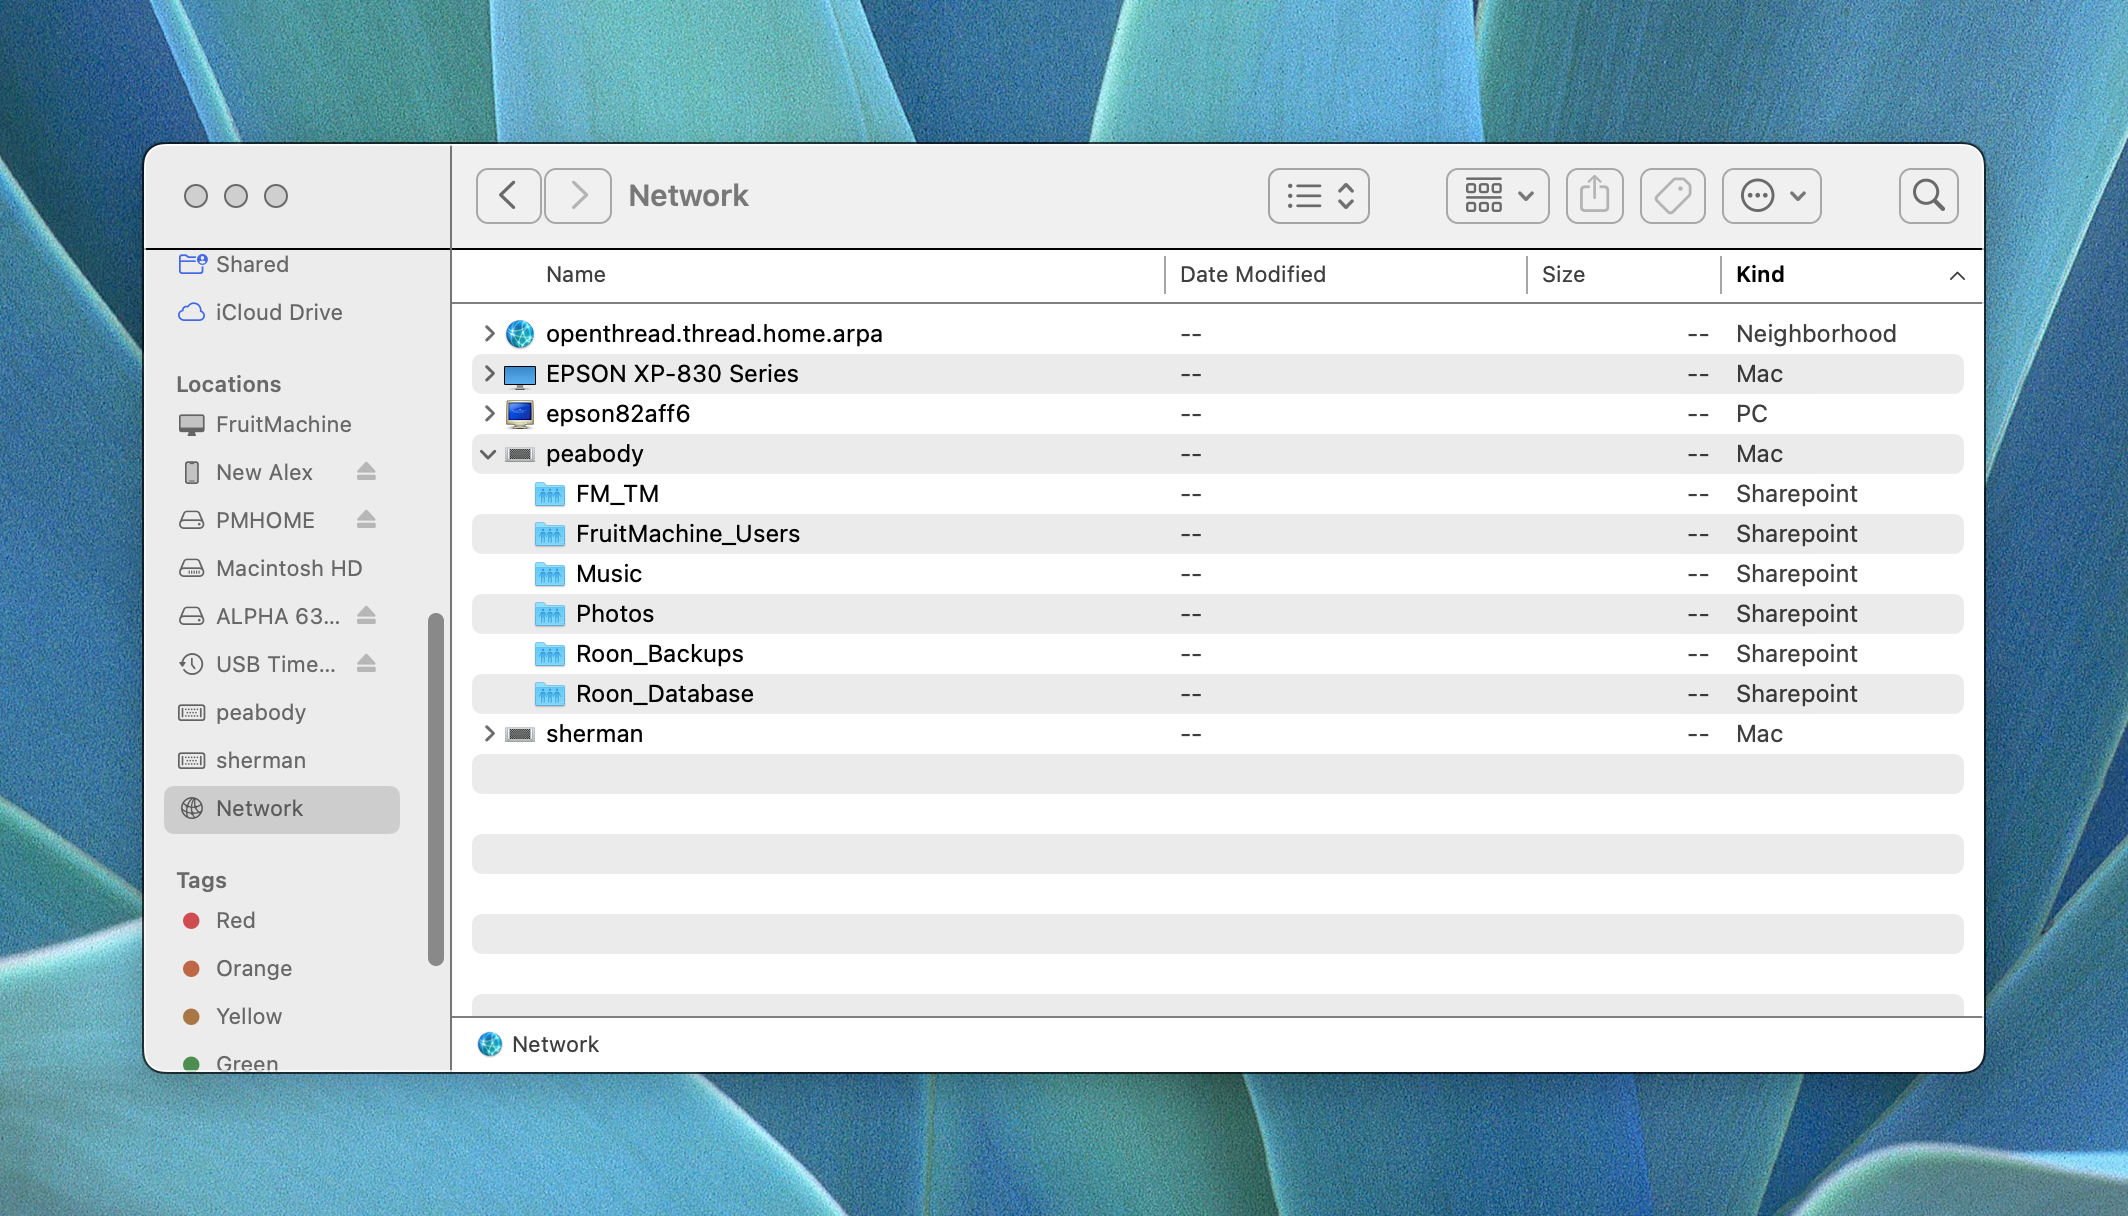
Using File Manager on the MacOS client, mount the share. Pick the server from Network then pick the server’s Time Machine share from the list presented.
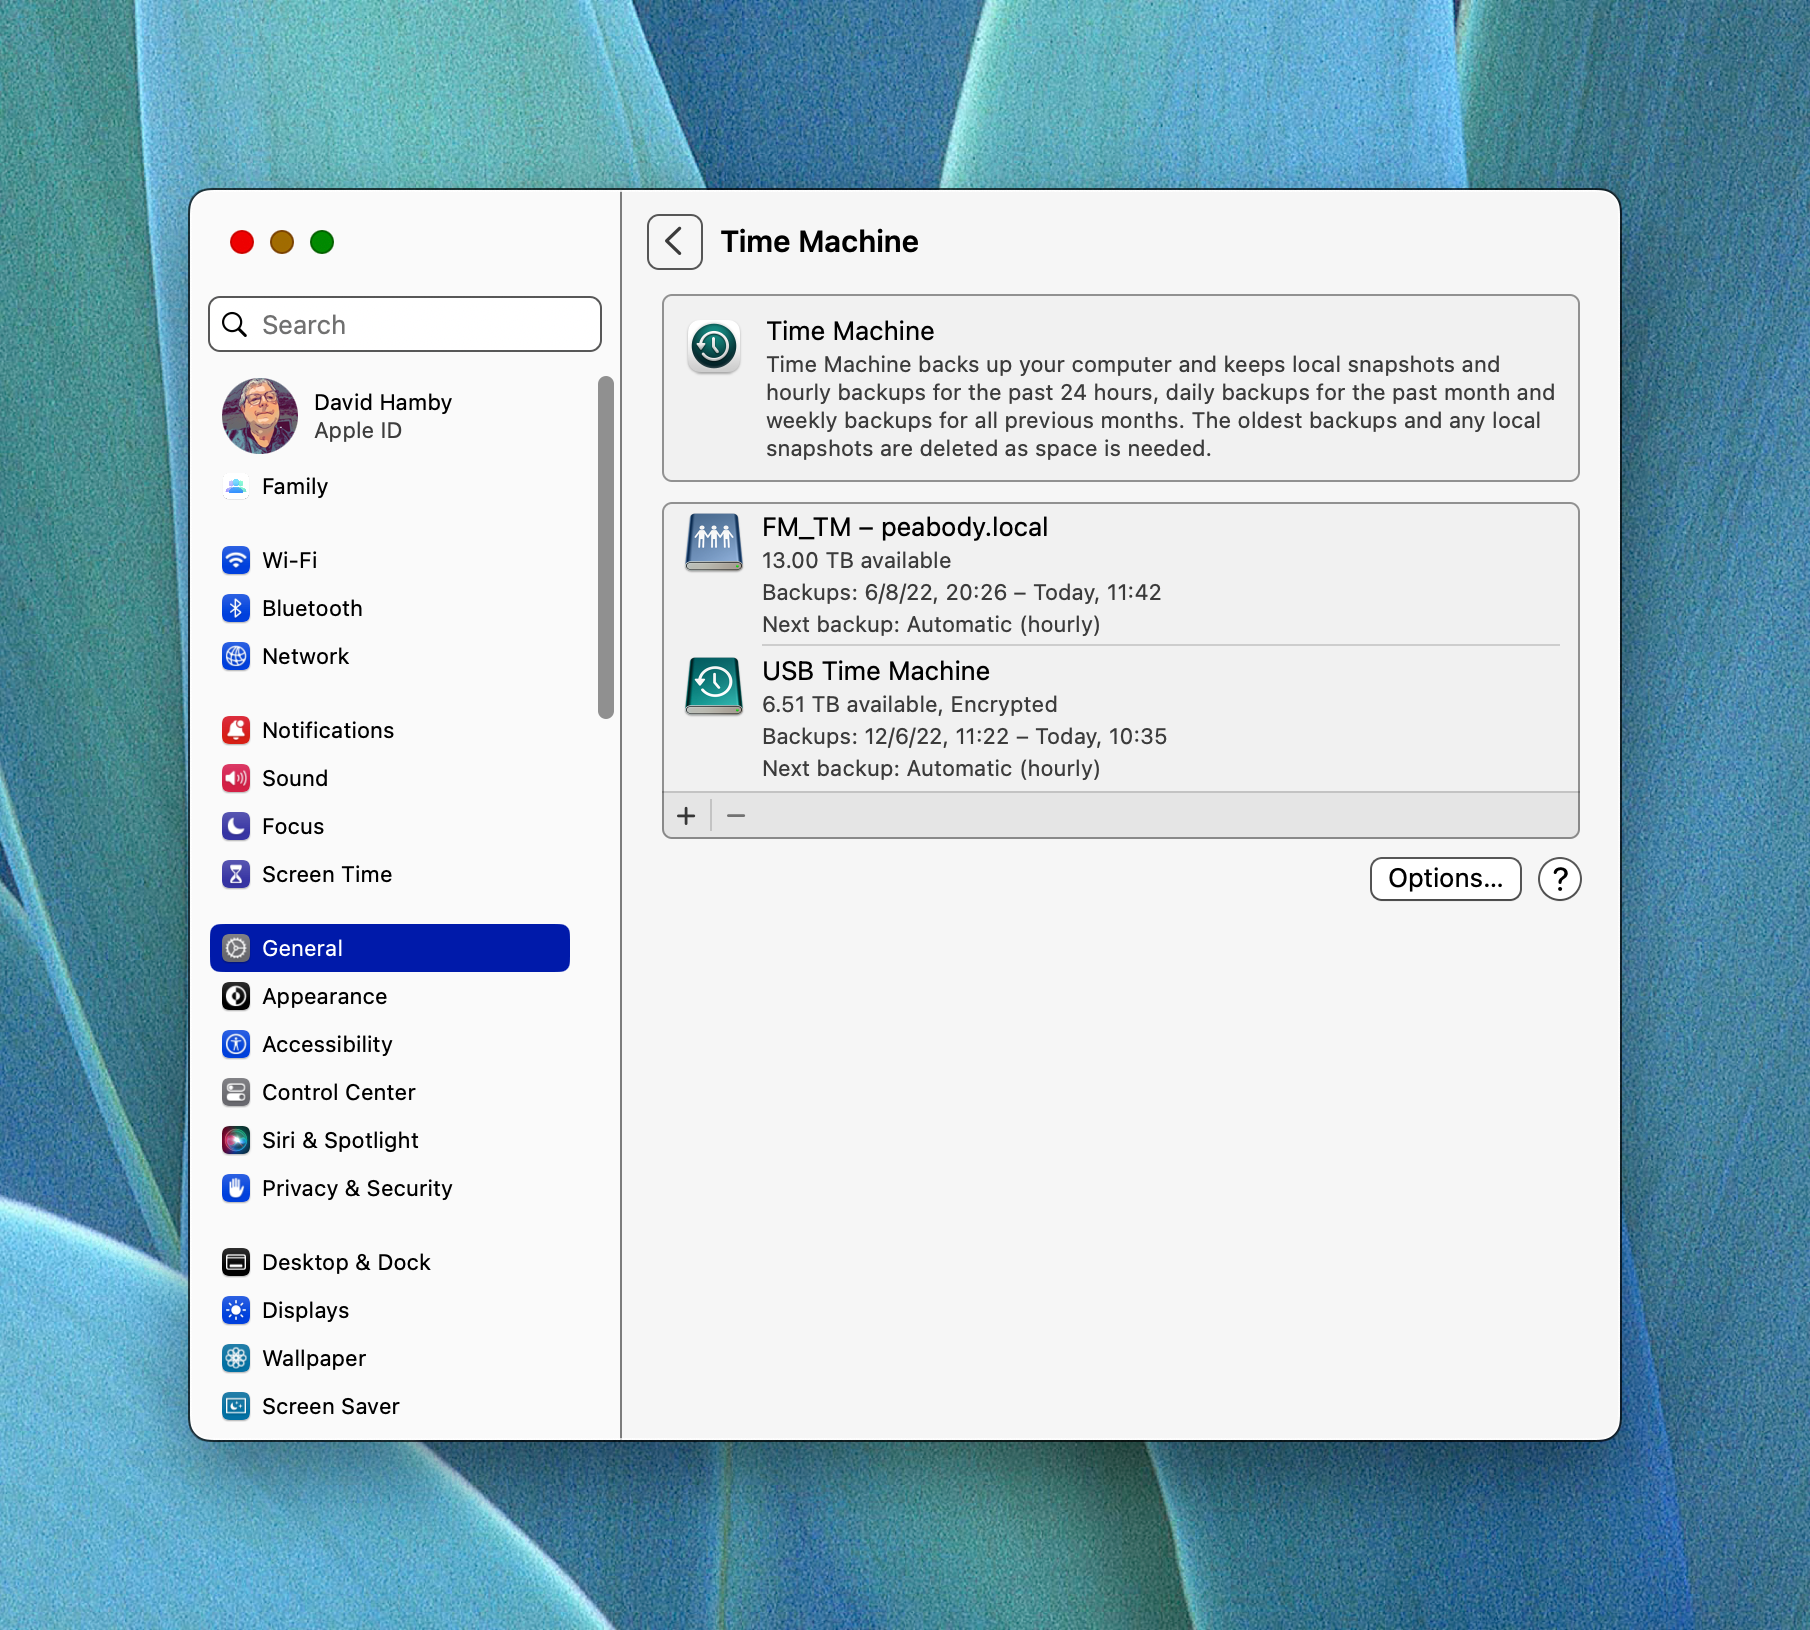
Once the share is successfully mounted, add it to Time Machine. I’ve elected to encrypt my Time Machine backups. There is an encryption key. I save it in Bitwarden password manager.

You must be logged in to post a comment.