Recently, a friend asked her social media peeps for camera recommendations for a first camera that is not a point and shoot. Her expected uses are garden macrophotography, the occasional photo of the moon, and urban/country trekking photography, including wildlife photography (BellaBob?). And of course, photographing her photogenic dogs when a phone camera just won’t do.
Since I was last in the marketplace, the players have changed somewhat. Several have introduced innovative product lines and new product types. Several manufacturers now make mirrorless advanced cameras. Some are styled to mimic the rangefinder cameras of old and others to mimic single lens reflex cameras. All have an eye to camera view finder. Two things distinguish an enthusiast camera from a point and shoot, the view finder, and the shutter lag.
Rather than try to survey the market, this article will inform you of important camera design considerations and the way in which they influence a purchasing decision. After reading this article, considering how you might use an advanced camera, and consideration of personal characteristics such as hand size, vision, and fiscal health, you can venture forth into the market place. I suggest that you handle each camera and take some snapshots with it on a memory card that you bring along. This will give you a feeling for the view finder, menus, and control layout that you won’t get from reading Amazon reviews. And keep your friendly shop keeper in business by buying local rather than ordering.
References
- https://en.wikipedia.org/wiki/F-number
- https://shop.usa.canon.com/
- http://www.fujifilmusa.com/products/digital_cameras/index.html
- https://www.nikonusa.com/en/nikon-products/dslr-cameras/index.page
- http://shop.panasonic.com/cameras-and-camcorders/cameras
- http://www.sony.com/electronics/cameras
- http://blog.phaseone.com/switching-capture-one-pro/
- http://www.adobe.com/products/photoshop-lightroom.html
- https://creativecommons.org/licenses/
- http://kenrockwell.com
Image Credits
With the gracious permission of their creators, I’ve used the following Creative Commons licensed images in this post.
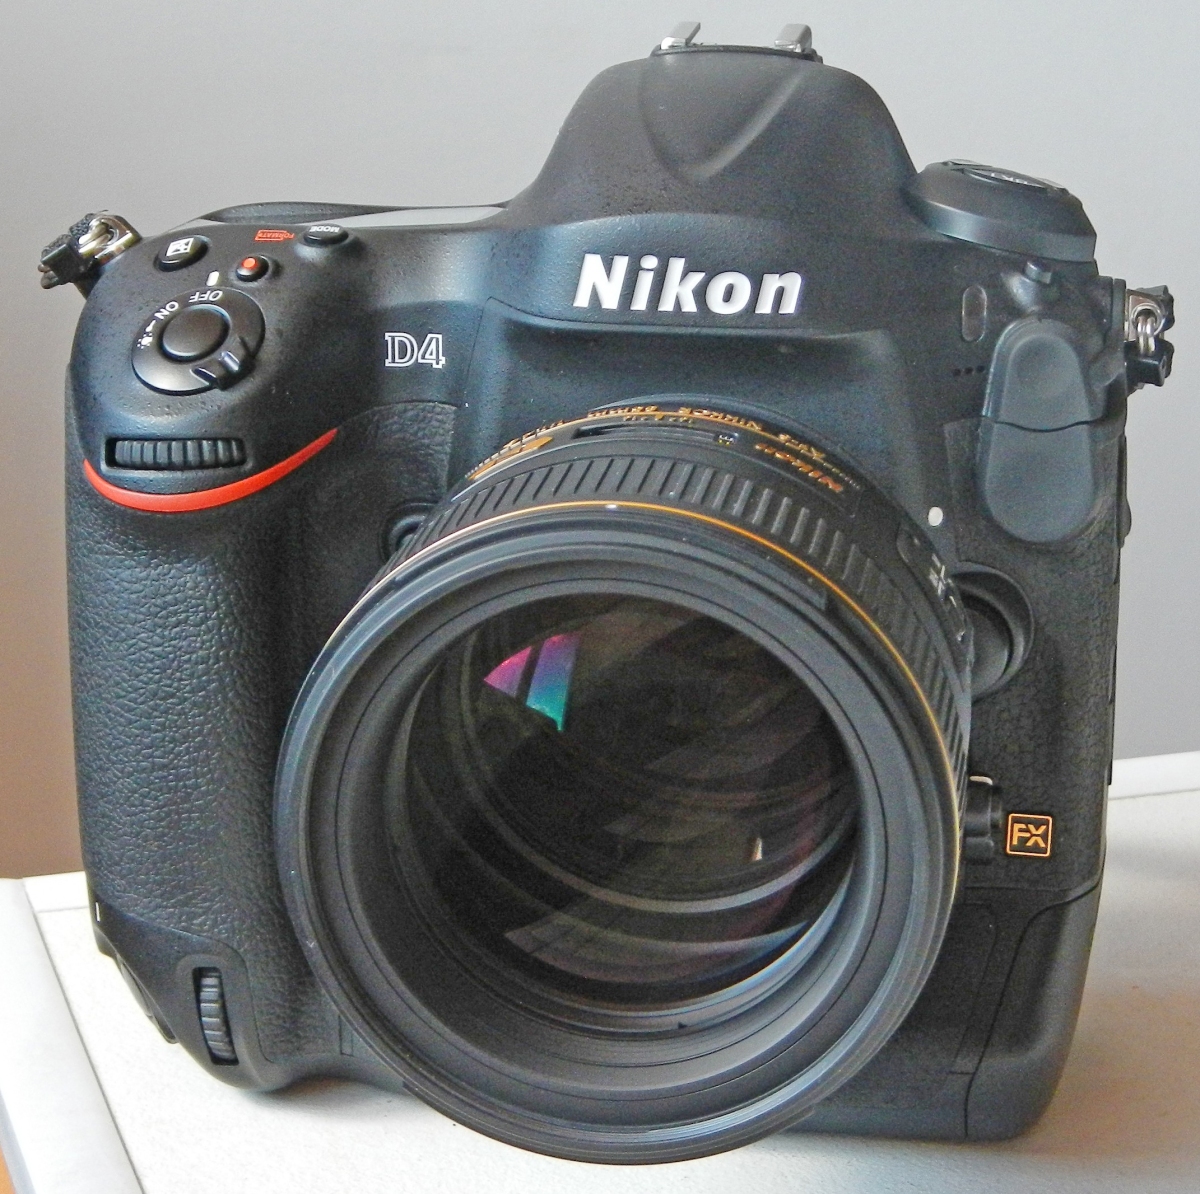
- Nikon D4 camera: By Zebarth – Own work, CC BY-SA 3.0, https://commons.wikimedia.org/w/index.php?curid=20753219
Revision History
- 31 March 2017: Added link to Ken Rockwell’s excellent review site.
Disclosure
I have several cameras: Apple iPhone 6+, Panasonic LUMIX LX2, and Sony Alpha 65. iPhone is my every day camera. The Panasonic fits nicely in a pocket but is a fixed-lens advanced point & shoot. The Sony Alpha 65 is my first DSLR, used mostly for photo walks. I use Adobe Lightroom Creative Cloud for rendering and library management.
Product Tiers
Major manufacturers like Canon, Fuji, Nikon, Panasonic, and Sony offer 2 or 3 product tiers. Most have an entry level camera, an enthusiast’s camera, and professional cameras. These differ dramatically in price. Beginner’s cameras are priced under $1000 US, the intermediate cameras are typically about twice that, and the professional cameras are typically four times that figure. With increasing price comes a larger sensor, increased durability, and more sophisticated image processing in camera.
The entry cameras have APS-C sensors and are designed for occasional use and ease of use. Professional cameras have full frame sensors and are designed to take thousands of images a day. Professional camera shutters have 1 million frame service life. Professional cameras omit ease of use and help features common to entry cameras. The enthusiast cameras fall in between in durability, ease of use, and software features.
Why an eye-to-camera finder?
To do serious photography, you must see a good approximation of what the camera lens is imaging. An LCD back panel finder washes out when used in bright sun. An eye-to-camera view finder allows you to make composition and exposure judgements by excluding the ambient light that is washing out the open finder’s image.
The advantage of a through the lens finder is that it can show the effect of aperture selection on depth of field. A small aperture around f11 gives good depth of field. Deliberately cranking the shutter speed up and opening the aperture reduces depth of field. Photographers call the soft background focus of large aperture images bokeh. Both lens aperture and lens focal length influence depth of field. Increasing aperture or increasing focal length reduces the lens’s depth of field, the zone of sharp focus. Bokeh results when the photographer has reduced the depth of field and placed the subject in sharp focus with the background and foreground out of focus.
The cameras discussed in this post have a rear LCD display in addition to the eye-to-camera viewfinder. The rear screen shows the same image as the eye-to-camera display. In these cameras, the rear screen is on an articulated mount that allows it to be folded down from the body and rotated for viewing from above or below. I often use the rear finder when photographing low subjects such as my dogs. I can lower the camera to their eye level and actively compose the image from above. Using my iPhone in the same manner is a point and pray – fix it in rendering proposition.
Electronic or Optical Finder?
Camera innovators have introduced enthusiast cameras having interchangeable lenses and electronic eye to camera finders. The electronic finder provides the advantages of an optical through the lens finder in a smaller, less costly package. Both allow you to accurately frame and focus a photo. The electronic finder offers several advantages not possible in the optical finder.
- The camera can overlay composition and exposure aids. For example, the camera can overlay a rule of thirds composition grid or an artificial horizon indicator that aids in leveling the camera in tilt and roll.
- The electronic finder can show how manual settings will influence the final image in a way optical finders cannot. The optical finder will show depth of field. The electronic finder also shows how deliberate under or over-exposure influences he detail in the image.
- The electronic finder is superior in low light situations. The camera’s image processor can intensify the low light image appearing in the finder. I find it particularly useful when photographing sunsets. The image must be underexposed to capture a dramatic sky. An optical finder camera composes at full aperture with stop-down occurring when the shutter is tripped. My Sony A65 stops the lens down during framing so I can see the effect of reducing the aperture. It also shows the effect of changing shutter speed, something an optical finder cannot do.
- Electronic finders can show an enlarged image. My A65 gives normal and times 1.4 views with the push of a button.
Many traditionalists prefer optical finders, that’s what they know. But modern electronic finders are adequately sharp and nuanced and do tricks the optical finder cannot.
Advanced Mirrorless Cameras
Fuji, Panasonic, and Sony have been innovating in camera design to introduce the mirrorless interchangeable lens camera. More recently, Canon and Nikon have joined the mirrorless advanced camera party. All five now make advanced mirrorless interchangeable lens cameras with eye to camera viewfinders in addition to the back panel display.
Professionals have embraced these cameras for tasks where compactness and an unobtrusive presence are desired, such as urban street photography. These cameras produce great images, are easy to take along, and don’t intimidate subjects like a larger pro camera would.
I recommend that you purchase this type of camera only with the eye-to-camera finder. Without it, you are back to point and pray in bright light.
Note that these cameras have a shorter lens flange to focal plane distance than mirror cameras. This means that they must be used with different lenses designed for the shorter rear projection distance. Manufacturer’s mirror camera and mirrorless camera lenses are not interchangeable. So read the fine print. In Sony land, mirrored cameras use A-mount lenses while mirrorless cameras use E-mount lenses. Just to add confusion, Sony makes mirrorless cameras similar in appearance to their mirrored cameras. Canon and Nikon are less far down this path.
Digital Single Lens Reflex Cameras
Most professional and enthusiast photographers use a digital single lens reflex camera like that in the featured image. These cameras have a single lens dominating the front face, a prism housing on the body above the lens, an optical viewfinder located behind the prism housing, and various dials and buttons in easy reach.
These cameras have interchangeable lenses, quick auto-focus, a minimum of delay between triggering of the exposure and the camera actually grabbing the image, the ability to grab a sequence of images at the rate of 5-10 frames per second, and the ability to record motion pictures at 30 or 60 frames per second at 1080p resolution. Most video logs are filmed with this type of camera, usually one made by Canon as Canon cameras are particularly good at recording video.
The distinguishing feature is that these cameras are designed to view the image formed by the primary lens during image composition. That image responds to changes of focus and aperture permitting the photographer to preview the aesthetic judgments made. This is difficult to do with the screen on the back of a point and shoot camera because ambient light and the small image size away from the eye limit what can be seen.
Compared to a phone camera, they also respond much more quickly. The shutter release has two positions: get ready, and do it. In get ready position, the camera performs auto-exposure and auto-focus tasks. Fully depressing the shutter button freezes these processes and triggers the exposure cycle. So you don’t miss grandchild’s smile or pet’s cute expression.
DSLR cameras also have a burst mode that rapidly grabs a sequence of image. Your buddy who posted the impressive pictures of his greyhounds at full gallop selected that image from a burst mode sequence.
Picking a manufacturer picks a lens family
When buying an interchangeable lens camera, any of the major manufacturers makes capable cameras and lenses. You can grab most any Canon, Fuji, Nikon, Panasonic, or Sony interchangeable lens camera and be happy. But each has its own proprietary lens mount and each licenses the right to make lenses having that mount to friend companies.
Nikon and Canon have the largest portfolios of licensees. Panasonic and Leica are friends. Panasonic makes internals for Leica bodies, licenses Leica lens designs, and can mount some Leica lens families.
Sony and Carl Zeiss have similar arrangements with Sony making Carl Zeiss lens designs, Carl Zeiss making lenses with the Sony lens mount, and Sony making its own lens designs. Both Panasonic and Sony have strong broadcast video camera lines and know what they are about making both camera bodies and lenses.
Another advantage of Canon and Nikon cameras is that a wide range of specialist lenses are available, more than for the other brands mentioned. And because professionals use Canon and Nikon cameras for demanding work, those specialist lenses can be rented for projects. Need a big long focal length lens for photographic wildlife on the veldt? You can hire that lens for hollibob.
Sensor size and pixel tradeoffs.
Manufacturers pick sensor size based on application and target product price. They offer APS-C sensors in their popular price cameras and full frame sensors in their professional cameras. As with everything in life, there are trade offs. Typically, manufacturers will offer one or more pixel counts in their product line. We’ve been conditioned that more pixels is better but that is not necessarily the case. For a given sensor size, increasing pixel count makes the pixels smaller. Smaller pixels are more sensitive to noise than larger pixels. The noise appears when making low light exposures. Usually, it presents as colored haze as a result of differential sensitivity of the sensor’s red, green, and blue sub-pixels.
Most enthusiast cameras permit you to set the sensitivity, the camera’s ISO number. The bigger the ISO number, the more sensitive the sensor is. But with increasing sensitivity comes increasing noise. As less and less light is captured, the thermal noise in the sensor becomes increasingly visible as haze in the image. If you do a lot of low light photography, you will eventually want a camera with a full frame sensor.
Exposure Relationships
Sensitivity, exposure time, and aperture are related. Increasing aperture (smaller f number) increases exposure. Reducing shutter speed increases exposure. Increasing sensitivity allows reducing the aperture or increasing the shutter speed.
The lens aperture is related to its focal length to allow easy determination of exposure from lens to lens. The f-numbers are arrange logarithmically base 2. The commonly encountered f-numbers are f22, f16, f11, f8, f5.6, f4, f2.8, f1.4. Sensitivity, aperture, and shutter speed are scaled such that, for example, ISO 100 sensitivity for 1/100 second at f16 gives a properly exposed mid-day outdoor photo. Shutter speeds also go by twos. Opening the aperture by one “stop” allows you to halve the shutter speed.
Modern cameras offer aperture priority, shutter priority, and adjustment of the ISO number or sensitivity. For proper exposure you can pick any two of these and the camera picks the third to give proper exposure. Typically, you pick the sensitivity and shutter speed and let the camera pick the aperture to give a properly exposed photo. You pick the shutter speed to minimize the amount of motion that occurs while the shutter is open. If your subject is still, you have the option of using a large aperture with a fast shutter speed to limit depth of field.
The ISO sensitivity standard is designed such that setting shutter speed to the reciprocal of sensitivity and aperture to f16 gives a properly exposed image in full sunlight. Convenient, no engineering! The standard film speeds of old were picked to align with shutter speeds. ISO 25, 50, 100, 200, and 400 were common.
Low Light Photography
For low light photography, you need two important accessories, a tripod and a cable release. The tripod holds the camera steady over long exposures. The cable release lets you manually release the shutter and hold it open for times longer than the camera’s control program offers. If you want to photograph the moon-rise or the Milky Way, these are essential pieces of kit.
It also helps to have “fast” lenses and a full frame sensor camera body. If you find yourself taking lots of low light images, you can purchase a second body having a full frame sensor for this application. This is the importance of lens families and picking a long lived lens family.
Prime Focus and Variable Focal Length Lenses
Most cameras come with a short focal length zoom lens covering the range from 15 mm to 50 mm focal length. These lenses are decent for learning composition and the effects of focal length on image appearance and work nicely for snapshots and trekking photos. With an APS-C sensor, this range gives good results.
We commonly call variable focal length lenses zoom lenses for the zooming in effect seen in film making. A prime lens has a fixed focal length. For a given focal length, a prime lens will be less expensive than an equivalent variable focal length lens because it will have less elements and less mechanical complexity. Modern zoom lenses are adequately sharp for all but the most demanding professional or technical applications.
Prime focus lenses trade zoom lens convenience for more light gathering ability. The money that would go into the variable focal length mechanism and the additional elements it requires is, instead, put into larger elements. A lens’s light gathering ability is related to the ratio of its focal length to its aperture. The lower that ratio, the bigger the front element and the more light the lens scoops up and focuses on the sensor.
As the aperture is opened, the lens’s depth of field decreases. f11 is a good target aperture for general shooting. Dropping down to f2.8 or f1.4 cuts the depth of field requiring careful focus on the subject and puts the foreground and background out of focus. An enthusiast cameral lets you experiment with these behaviors to make interesting images.
Sensor size affects lens design
APS-C sensors are smaller than full-frame sensors. Designing a lens for service only with APS-C sensors allows design of a more compact lens as the lens need not cover as wide an area at the focal plane. When an APS-C compact lens is placed on a full frame camera, only part of the sensor is illuminated resulting in a round image. Some cameras compensate for this by changing aspect ration when recording the image. Others put that task off to rendering.
In the Sony product line, DT lenses are designed for APS-C sensors and lenses without the DT identifier are designed for full frame sensors. Similar conventions apply in Canon and Nikon lines.
Pragmatics
Most first-time buyers pick an APS-C sensor camera
This is a cost consideration. APS-C sensors are about 2/3 the diagonal of a full-frame (24×36 mm) sensor. A lens is said to be a normal lens if it’s focal length is about equal to the sensor’s diagonal. Lenses with shorter focal lengths are wide-angle lenses. Lenses with longer focal length are telephoto lenses. Lenses having focal length of about 2 times the sensor diagonal are particularly good for taking portraits and candids of people.
First time buyers opt for the kit lens
In days past, manufacturers usually offered a 50 mm f3.5 kit lens. Today, it is common to offer a 15mm to 50mm zoom lens. The lens sensitivity ranges from f3.5 at 15 mm to about f5.6 at 50 mm. These lenses are good introductory lenses because they cover family photos at indoor gatherings, landscapes, and candid closeups indoors. They provide opportunity to learn about focal length, aperture, and depth of field management in image design. And do all of this without being overly large or costly. These lenses are good buys because they are manufactured in large numbers on automated production lines.
Once you learn your photography preferences with regard to subject matter, you can intelligently select specialist prime focus or zoom lenses suited to what you like to photograph and how you like to treat the subject matter.
Treat your self to a nice strap
The kit straps are often too short or uncomfortable 5 mm strips of black vinyl. My strap is from https://www.fatstraps.com/ best known for their guitar straps. Straps keep the butter fingered from drop-testing their expensive camera. And when out trekking, they should be long enough to carry the camera at your side or behind your back, camera on one side, strap on the other shoulder.
Your Vision
If you have normal vision or wear contact lenses, you’re all set. If you have astigmatism and wear glasses, you may need to use your glasses with the camera. Moving the camera away from the eye that little bit causes vignetting of the finder. Be sure that you can see the important parts of the frame and the various operating aids overlaid on the finder.
If you don’t have astigmatism, the camera finder’s diopter adjustment may allow you to set the camera to match the cylindrical correction of your eye glasses. This adjustment is calibrated in diopter units allowing you to match the value in your prescription.
Filters
Back in the old days, shops advised to keep a sky light filter on the lens to protect it from misfortune. It turns out that these filters are far more prone to damage than the lens front element and its coating. Additional cost, some image degradation, no lens protection, and a bit of extra profit for the shop.
Two filters you may find useful are a polarizing filter and the neutral density filter. The polarizing filter manages haze and reflections by polarization of the light entering the camera. There’s usually an indicator on the filter that you rotate to point toward the dominant light (usually the sun). These filters tame reflections from water, glass, and other nonmetallic surfaces and reduce glare. With a through the lens camera, you just turn the filter end ring to get the effect that you desire.
The second filter you may want to consider is a neutral density filter, a really dark one. Photographers use these to allow a long exposure time in bright light. An exposure time of 0.25 to 1.0 seconds gives the white moving water effect seen in many landscape photographs. Sadly, this has become a mountain stream photograph cliche but if you’re fond of cliche, the ND filter is the trick.
Consider filters when selecting lenses. On the lens front face will be a circle with line and a number that indicates the filter diameter needed by the lens. When choosing between similar lenses, pick one with the filter size of those you already have. Each unique size in your lens kit will require its own set of filters. Larger filters can be fitted to smaller lenses using adapter rings but these move the filter away and may introduce vignetting.
Image Management Software
Every camera manufacturer includes the software needed to transfer images from the camera to your computer. Twenty years ago, this was usually something Windows-only thrown together by the manufacturer’s IT shop. Today, Sony, and perhaps others, distribute quality image management and rendering software with their cameras.
Many working photographers use the Adobe Lightroom and Adobe Photoshop series for image management, rendering, and artistic license. In following a Sony advert appearing on Twitter, I discovered that Sony is distributing Phase One Pro 10 for its cameras. By way of promotion, Sony and Phase One make a useful subset of the professional products available to purchasers of Sony cameras. Phase One also offers promotional pricing for the Sony Pro feature set as this is written (Spring 2017).
The Phase One blog has a good article explaining the role that software plays in digital photography. If you have been using a phone camera and phone apps, they have been doing the work for you. You still have to do those same things, hopefully in a way that is camera manufacturer independent so you can continue to view and use older images should you move to a different camera in the future.
Copyright, Copyleft actually
Although not strictly required, you can add a copyright and rights grant statement to the metadata included with your images. The most commonly used license grants are those from the Creative Commons. This is as simple as adding your identifying information in the Copyright box and the appropriate Creative Commons license code describing permitted use of the image by others. I allow reuse with attribution and permit derivatives trusting that people will be cropping the image and not making nasty internet meme GIFS of them. When you post an image to Facebook or Twitter, you’re simplicity allowing reuse with attribution but without modification when you permit others to share your image.
