
I prefer to shoot raw rather than JPEG and recently discovered that regular iPhones (the not Pro kind) can shoot raw using 3rd party camera apps. Today we will take a look at a couple of these apps, Halide Camera [6] and Obscura Camera [7] and compare these to Apple Camera.
Here I’ll highlight the strengths and weaknesses of Apple Camera, Halide Camera, and Obscura Camera that I have experienced in use.
To shoot raw, you need to develop the latent image using a rendering app such as Skylum Luminar Neo [9] or PixelMator Pro or Photomator from the Pixelmator Folks [8].
Revisions
- 2023-09-02 Original
References
- Accidental Tech Podcast #550 Casey, Marko, and John ruminate at length on the various Apple iPhone cameras on the regular and Pro iPhones. After, all iPhone 15 launches real soon now so it is time to critique a year of life with the iPhone 14 cameras. Our three intrepid boffins range from snapshot taker to somewhat obsessed serious hobbyist. In passing, they gave a shout out to Camera Obscura, Camera Obscura Website built by a friend of the show.
- Wikipedia Raw Image Format
- Adobe Digital Negative File
- Adobe JPG File
- Halide Camera App Manual
- Halide Camera at the Apple App Store
- Obscura Camera App at the Apple App Store
- PixelMator Pro Website
- Skylum Luminar Neo Website
Dismal Wizard Photo CV
Back in the beginning, I began with a Kodak box camera predating the Instamatic cartridge loading cameras. In high school, I used an Argus 35 mm rangefinder camera that I took to college. I shot a fair bit of 35 mm slides with that camera.
After college, I bought a Minolta SRT 101 match needle exposure series camera and after the Navy, another, a Minolta MD5, an analog automatic exposure camera. Somewhere, I picked up an Olympus soap bar rangefinder camera with auto exposure that I used on a European outing or two.
And that’s where things stayed until 2002 when I bought my first digital camera, a Sony rangefinder camera. Later, I bought a Panasonic Lumix, then two Sony cameras, the second of these mirrorless.
The Panasonic Lumix is auto focus and autoexposure with an optical viewfinder. It’s a compact holiday camera that I still have. Leica and Panasonic collaborated on this camera with Leica leading lens design and Panasonic the body. So this camera has a lens that puts it at the top of its class.
Printing
While in the Navy, I learned to process monochrome film and make prints. While in Connecticut, I had an enlarger and kit to make monochrome prints using an Ilford drum rather than trays for the prints. I’d put a sheet of plywood over the bathtub and set up the enlarger there to improvise a darkroom.
Since then, I’ve used various MacOS apps to render prints including iPhoto, Photos, Aperture, Light Room, and Capture One. More recently, I have moved to Skylum Luminar Neo (from the folks who made SnapSeed in the naughts), PixelMator Pro and its PhotoMator cousin. Digital printing is much quicker than wet printing and you can directly influence what happens through the magic of mathematics and machine learning to select and guide the maths applied ot an image.
Current Cameras
I have several in current use. The real camera is a Sony Alpha 6300 mirrorless single lens camera with a 20mm to 200mm travel zoom lens. Then I have an iPhone and an iPad Mini 5. The iPhone has 3 cameras, the selfie camera on the front, and the wide camera and normal camera on the back. I have 3 applications to uses these cameras, the Apple iOS Camera app, Halide Camera and Camera Obscura by independent Apple developers. Both Halide Camera and Camera Obscura have fared well in App Store editorial review.
iPhone Cameras
iPhones have several cameras that vary by model. Each has a selfie camera on the front and one or more cameras on the back. Typically, there is a wide camera and a normal camera and the phone picks one to use based on the image identification. iPhone emulates a zoom lens by allowing you to crop the image before capture. I prefer to capture the full frame in the field and crop in post-production.
The phone software has a camera library built in that allows applications to use the hardware camera, including control of which sensor is used, camera settings, camera focus, and camera exposure setting following a programmed exposure curve. You pick the aperture, and the camera automation picks the shutter speed for a sharp image. It also manipulates sensitivity to stay within the sensor’s dynamic range.
Apple iOS cameras have at least 3 apps available for operating the iPhone camera, Apple’s Camera App, Lux’s Halide Camera, and Ben McCarthy’s Obscura Camera. Each works with the iPhone camera software kit to provide direct gesture control of the camera, save images to the camera roll, and make previews for the screen and rushes (proof prints of movie scenes originally) for the camera roll. Later, you can use a photo editor to make a more pleasing rendering that replaces the rush image.
Apple Camera App and Obscura Camera can make both stills and videos. Halide is still only. Each of the three has its own strengths and limitations.
Why use a Third-Party Camera Control ?
Apple has made camera for casual use by most iPhone owners. It is simple to use and does a lot of machine learning jiggery pokey to get a usable image from the sensor to the camera roll. On iPhones, it shoots JPEG only. On iPhone Pro, both JPEG [4] and RAW [2] (explained below). When all else fails, Apple Camera App will get something usable on the camera roll. It excels at hand-held low light photography.
Ahead, I’ll introduce you to two additional camera interfaces and suggest when you might want to use each. The choices the AI makes at the time of the shot result in the potential loss of information from the latent image. Capturing Camera Raw, image generation is deferred allowing you to guide the AI tools rendering of the latent images captured in the field. These two apps each have their own view of reality. More about this to come.
iOS Camera App
Apple’s Camera App comes with the iPhone as part of the factory software. It is there and ready to go out of the box. And it is an excellent camera for shooting in really kinky lighting like low light available light indoors and outdoors available light between sunset and dawn.
On iPhone, it shoots only regular images, no camera raw. On iPhone Pro, it takes both regular and camera raw images. The standard iOS app is largely automatic but does have some touch screen controls to tinker with focus and coach exposure. Best use is to tap on the subject and the camera will optimize focus and exposure for the bounding box containing the object image that you poked.
Digital Hocus Focus
Here we dip our toes into digital photo file types a little, just the concepts, no formats, no math. Reasonably priced digital cameras produce two types of images files, compressed and raw. The compressed files use the JPEG file format. Most image aware applications can render them. RAW file format is camera specific and contains the sensor data and settings that were recorded to capture an image. The data is pixel by pixel red, green, and blue values that must be further processed for a display device.
The JPEG stands for joint photographic expert group, an industry consortium that standardized photographic image lossy compression. RAW is “camera raw”, a device specific format for storing images that preserves the camera’s sensor values and the camera’s settings. Each image processing program uses either Apple’s camera raw library or an internal one to export images from the camera or its storage media, save them to the host’s image library (MacOS System Photo Library or the Adobe Lightroom Catalog, for example, and make a working view to show to you.

JPEG images are easily rendered by common image viewing applications. RAW files require construction of an image from the individual pixel red, green, and blue values that are encoded in a camera specific format. So RAW files contain latent images, to borrow a film term, that must be processed in the “light room”, to play on another film term, to make them visible.
But wait, JPEG files require processing before viewing to expand the compressed image. So, they too contain a latent image. Adobe has put some effort into establishing and sharing a standardized raw image file format that permits interchange of raw images between applications. This is the DNG [3] file type or digital negative file.
Halide Camera
Halide Camera [6] is an independent developer take on the Camera app that gives access to both JPEG and RAW images on all iPhone models currently supported. You manipulate Halide camera controls directly to identify the important bit of the image, adjust exposure, adjust focus, etc. and make the capture. I find Halide Camera generally easy to use but occasionally manage to put it exposure override mode to underexpose or overexpose the image. Usually, I can rescue these images in post-production.
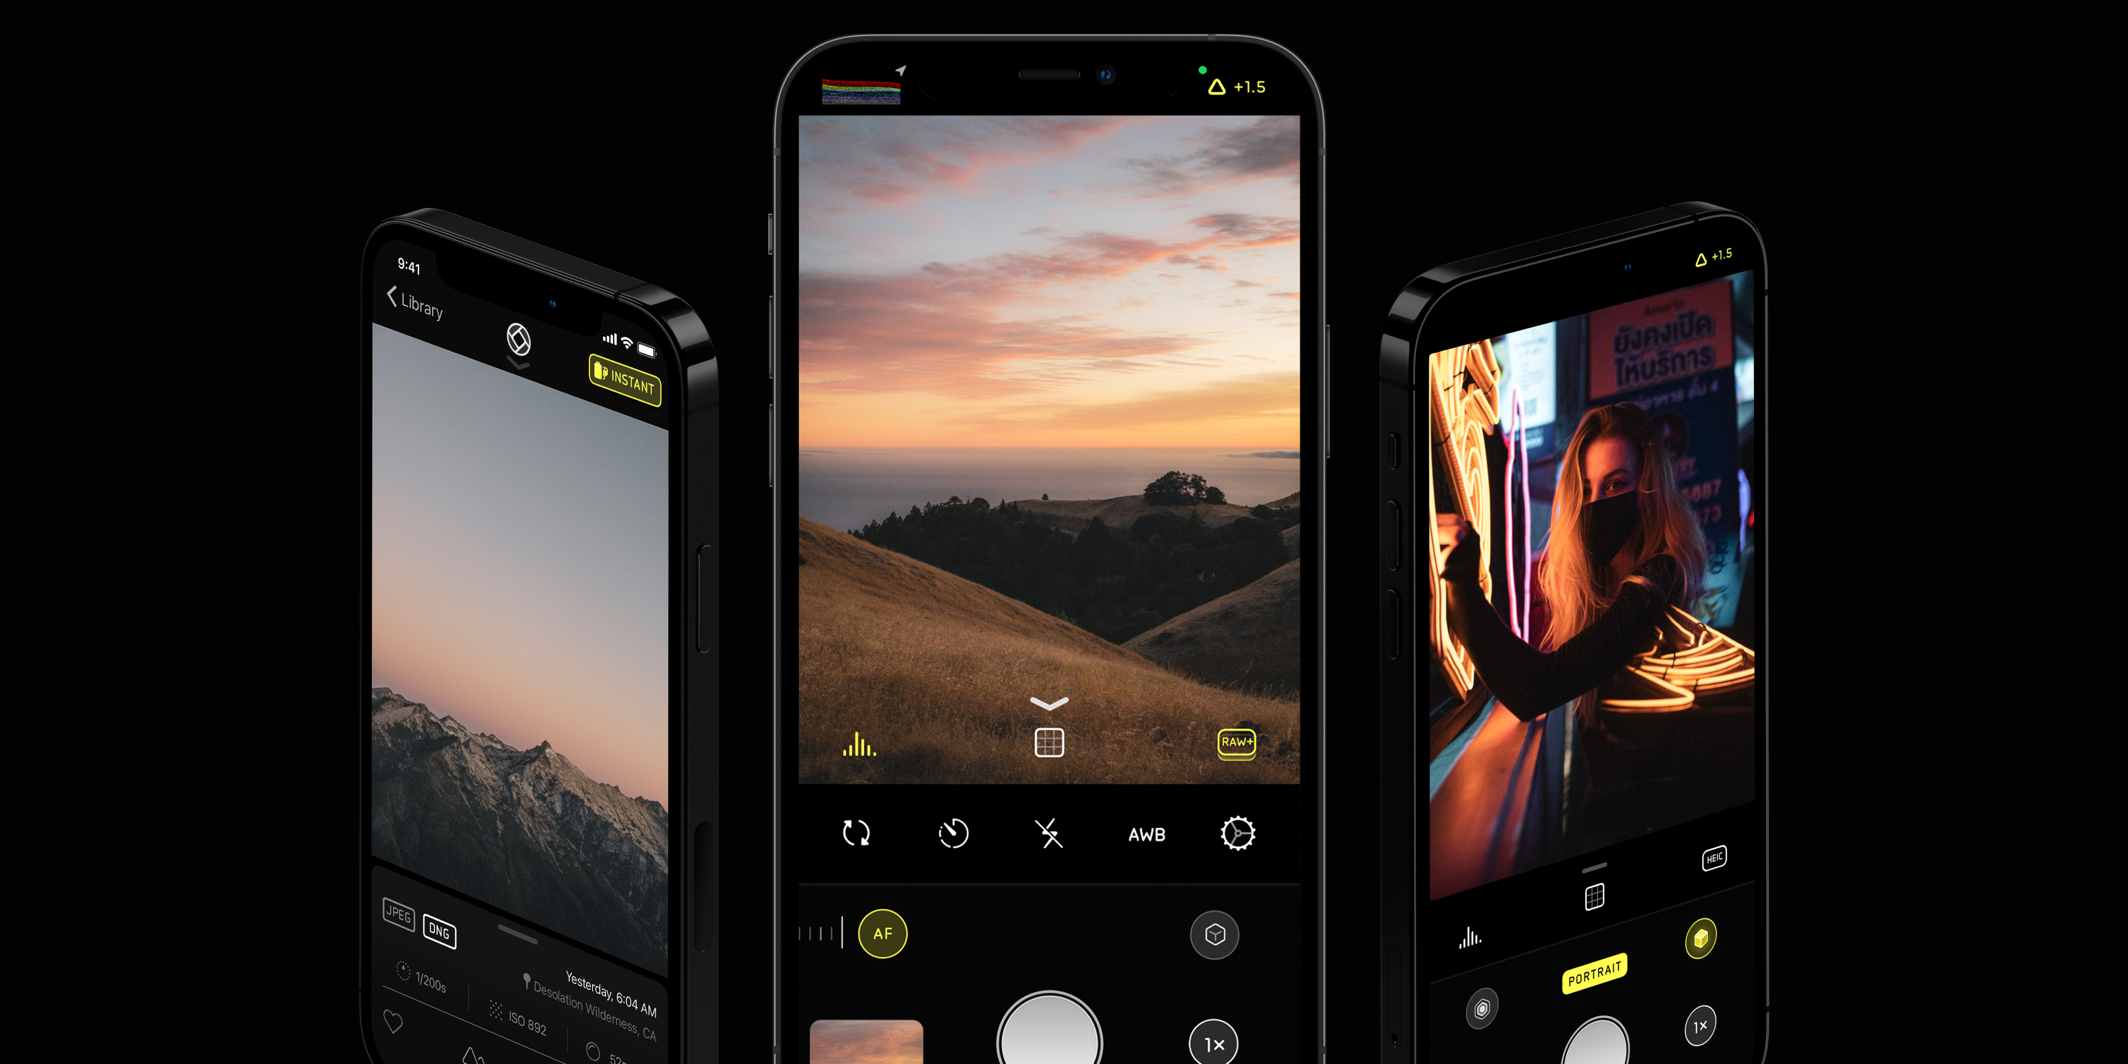
The buttons on the viewfinder enable display of an exposure histogram, gridlines, and switch between the back camera and the selfie camera.
The buttons below the viewfinder bring up widgets to make individual adjustments in the controls area. However, Halide has its exposure adjustment controls on the view finder. I keep accidentally engaging exposure adjustment. Otherwise, Halide has been easy to use and is best learned by exploration.
Tapping on the display and swiping up or down adjusts exposure. Swiping left brings out the exposure adjustment controls.

Obscura Camera
Obscura Camera [7] has another take on controls widgets. Selecting a function activates a gesture control widget to make the adjustment. Touching the image tells Obscura to use that area for exposure determination. No camera mode changes, exposure changes, or other surprises.

The left image shows the camera as it wakes. The circle over the image indicates where the camera is taking a spot exposure reading. The middle image shows Obscura exposure manual coaching in exposure values above or below normal exposure. The right image shows auto-focus coaching to get the cat’s whiskers in sharp focus.
Obscura can take compressed images or raw and can take still images or video.
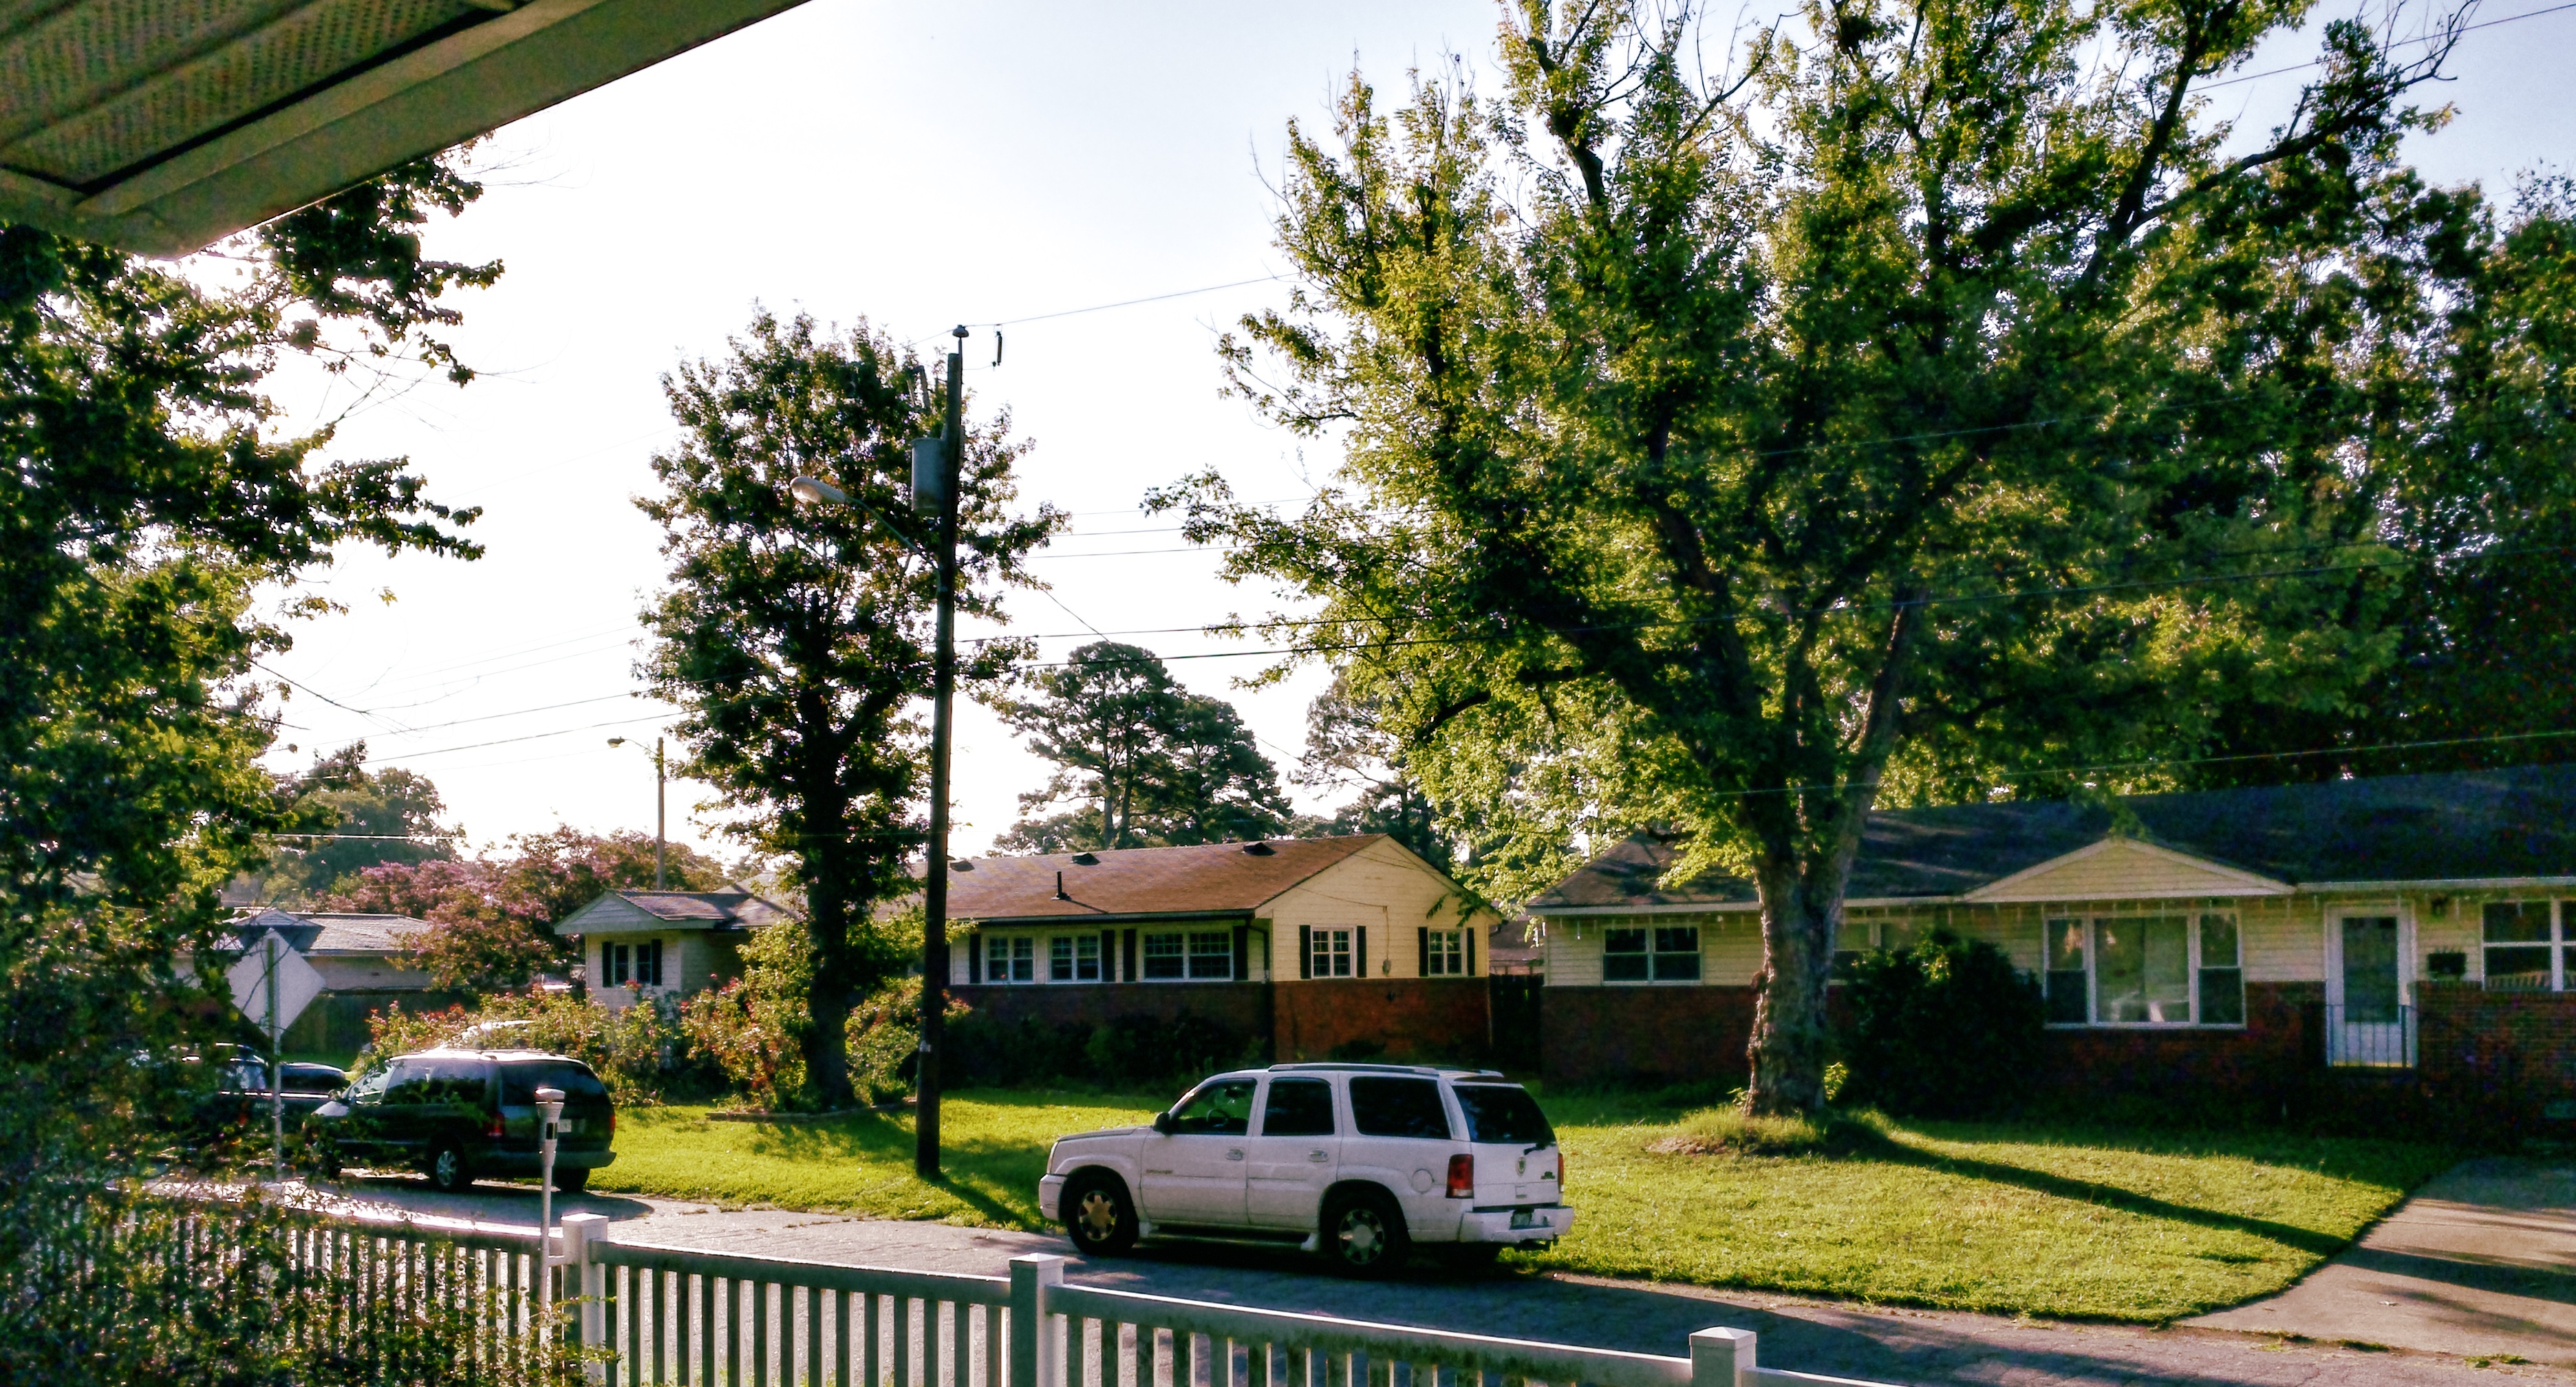
Rendered in PixelMator Pro
Comparison of Camera Apps
All three applications have their uses but Apple Camera is needed for special modes and really dark scenes. Nothing is better at night. Halide or Obscura is needed to shoot RAW on regular iPhone.

- Apple Camera app does it almost all. It gives access to each camera feature Apple intended for a given iPhone to provide.
- Apple Camera has the best low light capability of the lot. If taking photos at midnight in a blackboard factory is your thing, Apple Camera App is your friend.
- Halide camera lets iPhone shoot raw. If you shoot raw with your real camera, and you prefer the control raw gives, Halide is your friend. But no video, no Pro Res, etc.
- Touching the Halide “ground glass” causes more to happen than I’d like. I keep putting the beast in exposure override or focus override by accident. I’ve been able to save most mishaps in post-production.
- Obscura also shoots RAW. It has a least astonishment user interface. I’ve never gotten myself into unexpected behavior. Touching the ground glass informs the camera of the area of regard within the camera’s field of view. Touching directs the attention of auto-focus and auto-exposure to that part of the image. Touching never causes a mode change or override to happen.
- Obscura shows you the exposure values it is about to use ISO, aperture, and shutter speed.
- Obscura lets you pick color look, adjust white balance, and coach focus. All of this with controls below the image. The ground glass image changes to show the result of each control manipulation. You can easily see which adjustments are active and can disable each.
- Obscura appears to take a bit darker latent image than Halide.
- When shooting RAW, the tools used in post-production dominate the image look much more so than when JPEGS are being taken.
- Luminar Neo and PixelMator have saved some pretty dark or white-out images.
When to use each?

I’ve not owned an iPhone Pro so I can’t help you with iPhone Pro. But here are the key use case things I use to select a camera.

- If you want to shoot RAW using an iPhone model for which Apple Camera will not save RAW, you need a third party app.
- If you want to shoot “live photos” (3 seconds. of video), you must use Apple Camera.
- If the sky is black, you must use Apple Camera
- If I’m shooting dogs in the garden, there’s no substitute for the real camera’s zoom lens. That big hunk of glass amazes me with sharpness and clarity.
- If it’s sunset, the real camera in manual and underexposing gets me a colorful sky.
- The best camera is often the one at hand. Candid events don’t wait for you to schlep the real camera to the scene. Use what you brung.
- Apple Camera makes good video but stray touches keep taking me into video, slow motion, or timelapse unintended. And that portrait light simulation is best done in post.

You must be logged in to post a comment.